High-quality ingredients like fresh mascarpone, egg yolks, and strong espresso are key to an authentic tiramisu.
No Runny Filling, No Soggy Layers, Just Incredibly Creamy & Defined Results.
Are you tired of Perfect tiramisu recipes that become a soupy, messy disappointment? This authentic Italian dessert is your ultimate solution. It features a unique Zabaglione Method that guarantees a rich, sliceable texture with a deep, complex flavor—all achieved by mastering one core technique. It’s the guaranteed way to master a foundational culinary skill and bring a show-stopping, elegant finish to your table, transforming simple ingredients into a confident baking triumph.
Why This Technique is a Fundamental Breakthrough for Authentic Tiramisu
Before you brew the espresso… here’s what makes this method a game-changer for anyone craving perfect homemade tiramisu with stunning simplicity.
Consistently Flawless Texture, Made with a Simple Process
➤ The Zabaglione Advantage: Cook the eggs and sugar into a thick, stable custard base.
➤ The Mascarpone Marriage: Fold the cooled zabaglione into mascarpone for a rich, non-runny cream.
➤ The Layering Perfection: Assemble confidently knowing your cream will hold its shape.
A Truly Effortless and Impressive Dessert
▣ The 1-Technique Promise: Build the entire dessert around this masterful step.
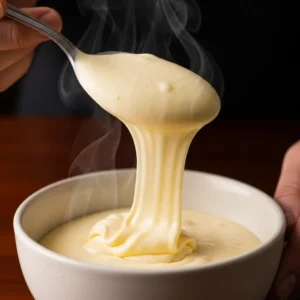
▣ The Foolproof Visual Cues: The zabaglione is ready when it ribbons off the whisk.
▣ The Ultimate Crowd-Pleasing Dessert: A classic, elegant slice that impresses every single time.
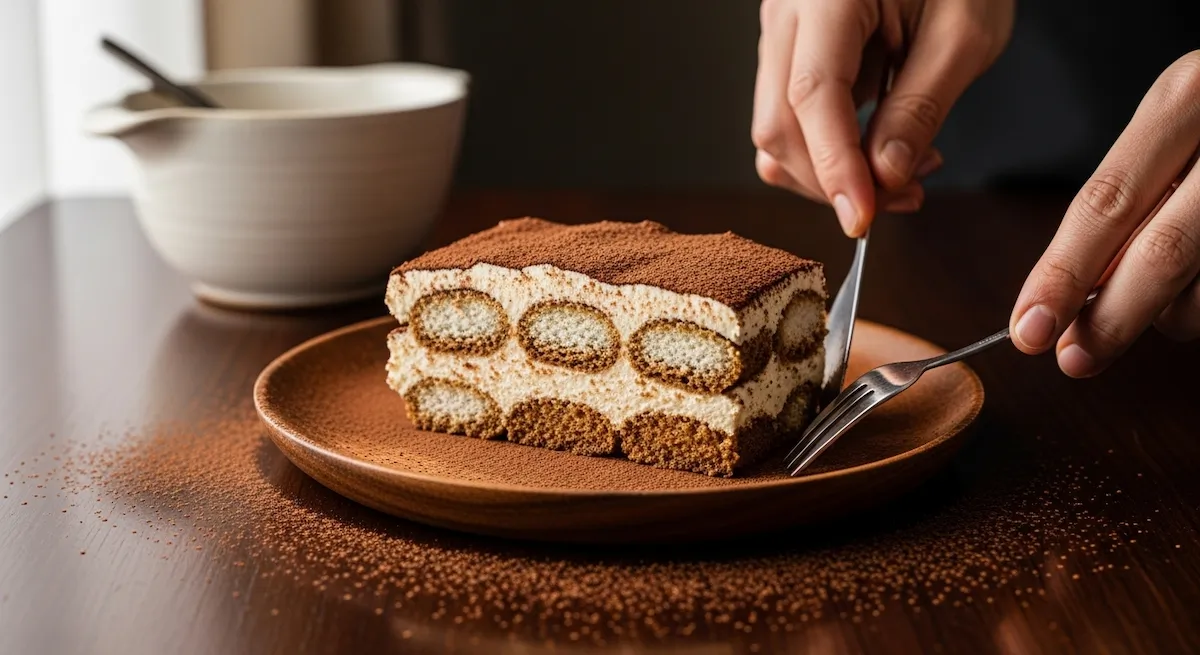
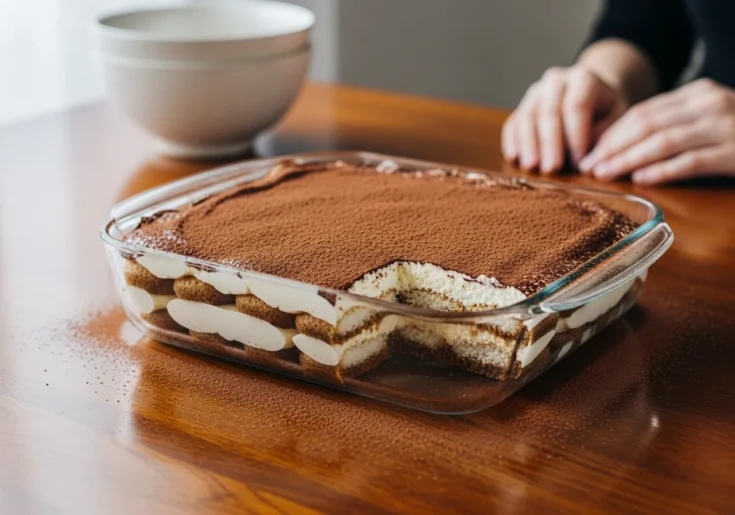
Pro Tip:For the cleanest cuts, dip a sharp knife in hot water, wipe it dry, and then slice. This glides through the creamy layers without sticking.
🎯 1. Perfect Party Planning
→ Stress-Free Solution: Prepare your tiramisu recipe a day before your event
→ Flavor Development: The components in this tiramisu recipe meld beautifully overnight
→ Time Management: Focus on guests instead of last-minute preparation for your tiramisu recipe
📅 2. Advance Preparation
→ Make-Ahead Magic: Assemble the complete tiramisu recipe 1-2 days in advance
→ Flavor Fusion: Resting allows the coffee and mascarpone in your tiramisu recipe to marry
→ Textural Perfection: The ladyfingers soften to an ideal consistency in this perfect tiramisu recipe
🧊 3. Proper Storage
→ Refrigeration: Keep your tiramisu recipe covered in the fridge for up to 3 days
→ Avoid Freezing: This tiramisu recipe is best fresh, as freezing alters the creamy texture
→ Protection: Use an airtight container or tight plastic wrap for your tiramisu recipe
🎉 4. Effortless Entertaining
→ Ready to Serve: Your tiramisu recipe is perfectly chilled and set when guests arrive
→ Elegant Presentation: A dusting of cocoa completes your make-ahead tiramisu recipe
→ Crowd Pleaser: This classic tiramisu recipe is always a hit at dinner parties
🌟 5. Flavor Enhancement
→ Matured Taste: This tiramisu recipe actually improves in flavor after 24 hours
→ Balanced Sweetness: The resting period perfects the balance in your tiramisu recipe
→ Cohesive Dessert: All elements in your tiramisu recipe become harmoniously united
🍽️ 6. Serving Strategy
→ Clean Slices: Use a hot, wet knife for perfect portions of your perfect tiramisu recipe
→ Garnish Fresh: Add the final cocoa dusting just before serving your tiramisu recipe
→ Temperature Perfect: This tiramisu recipe is ideally served chilled but not ice-cold
Pro Tip: Making this tiramisu recipe ahead saves time and improves the flavour, as the coffee and liqueur have more time to permeate the layers – making your tiramisu recipe the ultimate stress-free party centrepiece!
Crafted in My Kitchen: The Secret to a Truly Foolproof Tiramisu
The “Reinvented” Path to a Perfectly Structured Dessert
This flawless tiramisu recipe was born from a mission to end runny, soupy, or unstable Italian desserts for good. We’ve perfected this simple, time-honoured Zabaglione Method to turn a daunting culinary challenge into a calm and confident ritual, guaranteed to deliver the most creamy, sliceable texture your entire family will adore.
Here’s the Passion We Baked Into Every Layer:
★ Inspired by the quest for a stunningly structured, rich, and authentic homemade tiramisu every time.
★ Born from the belief that creating a show-stopping classic dessert should be approachable and rewarding.
★ Crafted around a unique Zabaglione Method because we value a foolproof technique and your peace of mind.
★ Kitchen tested and approved by friends and family countless times to guarantee the perfect dessert everyone craves.
★ Designed to be the last perfect tiramisu recipe you’ll ever need to search for.
Pro Tip:Use a light hand when spreading the mascarpone cream over the ladyfingers for picture-perfect layers. A gentle touch preserves the airy texture you’ve worked hard to create.
🥄 1. Runny Zabaglione
→ Quick Thicken: Whisk over a double boiler until your tiramisu recipe base thickens
→ Cornstarch Rescue: Add 1 tsp dissolved in cold water to stabilize your tiramisu recipe
→ Chill Method: Refrigerate the mixture before continuing with your tiramisu recipe
💨 2. Over-Whipped Cream
→ Gentle Fix: Fold in 1 tbsp liquid cream to salvage your tiramisu recipe texture
→ Prevention Tip: Watch for soft peaks when preparing your tiramisu recipe
→ Recovery Method: Use slightly grainy cream rather than starting your tiramisu recipe over
🍷 3. Too Boozy
→ Balance Act: Add extra mascarpone to mellow your tiramisu recipe flavor
→ Dilution Trick: Increase coffee ratio in the remaining steps of your tiramisu recipe
→ Serving Tip: Pair with sweet berries to complement your strong tiramisu recipe
💧 4. Soggy Ladyfingers
→ Dip Technique: Quick 1-2 second dip preserves structure in your tiramisu recipe
→ Brush Method: Use a pastry brush to control moisture in your tiramisu recipe layers
→ Assembly Tip: Layer cream first, then fingers in your revised tiramisu recipe approach
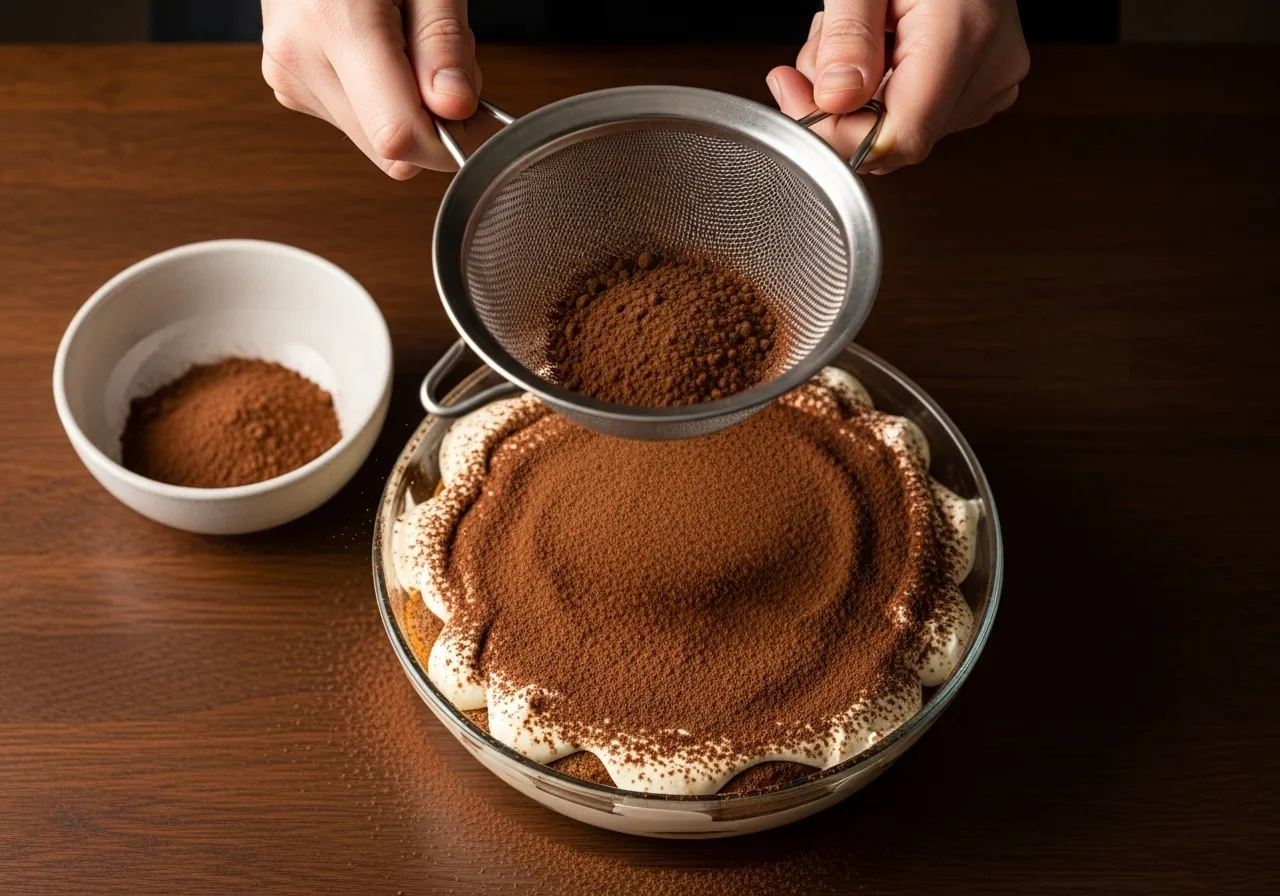
🍫 5. Cocoa Absorption
→ Timing Matters: Dust cocoa right before serving your perfect tiramisu recipe
→ Sifting Secret: Use a fine mesh strainer for your tiramisu recipe presentation
→ Layering Logic: Apply thin cocoa layers within your tiramisu recipe assembly
🧊 6. Setting Issues
→ Patience Payoff: Allow 6+ hours for your tiramisu recipe to set properly
→ Temperature Check: Ensure your fridge is at 40°F for ideal tiramisu recipe results
→ Emergency Fix: Freeze for 1 hour if your tiramisu recipe needs faster setting
Pro Tip: Even experienced bakers face challenges, but these quick fixes will always rescue your perfect tiramisu recipe – making you the go-to expert for flawless Italian desserts that impress every guest!
The Tiramisu Tragedy: Why Most Home Recipes Fail
Solving the Common Kitchen Disasters for Good
That moment of disappointment when your beautiful tiramisu recipe turns into a puddle is a genuine kitchen heartbreak. Most methods skip the crucial structural step, leading to a dessert that can’t hold its own. We’ve engineered this method to conquer the failures plaguing so many homemade tiramisu attempts, ensuring your creation is as stunning as your vision.
Here’s How We Conquer Every Common Pitfall:
◆ Designed to eliminate the dreaded runny, soupy filling that collapses upon slicing.
◆ Created to prevent soggy, disintegrating ladyfingers that ruin the perfect Italian dessert experience.
◆ Engineered for a robust cream with defined, beautiful layers from the first slice to the last.
◆ Tested to balance the coffee soak ideally, avoiding a bitter or weak flavor profile.
◆ Crafted to be the definitive, foolproof, perfect tiramisu recipe that banishes kitchen frustration forever.
Pro Tip:Ensure your mascarpone is cold straight from the fridge for a fluffier, easier-to-whip cream.
Why This Creamy Italian Cheese Makes All the Difference
🇮🇹 1. Authentic Origins
→ Italian Heritage: True mascarpone elevates any authentic tiramisu recipe
→ Fresh Cheese Status: Unlike aged cheeses, it’s essential for your tiramisu recipe
→ Regional Specialty: Sourced from Lombardy for the perfect tiramisu recipe foundation
🥛 2. Creamy Composition
→ High Fat Content: 60-75% butterfat creates the luxurious texture in your tiramisu recipe
→ Double Cream Base: Made from cream, not milk, for a rich tiramisu recipe experience
→ No Culturing: The mild flavor won’t overpower other elements in your tiramisu recipe
👅 3. Flavor Profile
→ Sweet-Tangy Balance: Provides the signature taste in every great tiramisu recipe
→ Mild Sweetness: Naturally complements coffee in your classic tiramisu recipe
→ Buttery Notes: Adds depth without acidity to your perfected tiramisu recipe
❌ 4. Substitute Warnings
→ Cream Cheese Fails: Too tangy and dense for an authentic tiramisu recipe
→ Whipped Cream Lacks: Missing the body needed for a stable tiramisu recipe
→ Greek Yogurt Issues: Too acidic and thin for your traditional tiramisu recipe
🛒 5. Selection Tips
→ Freshness First: Check expiration dates when buying for your tiramisu recipe
→ Italian Brands: Look for BelGioioso or Polenghi for your premium tiramisu recipe
→ Texture Test: It should be spoonable, not runny, for your ideal tiramisu recipe
💡 6. Handling Wisdom
→ Room Temperature: Bring to cool room temp. before using in your tiramisu recipe
→ Gentle Folding: Avoid overmixing to maintain air in your tiramisu recipe cream
→ No Substitutions: Authentic mascarpone is crucial for your best tiramisu recipe
Pro Tip: Never compromise on mascarpone – it’s the soul of your tiramisu recipe! The unique fat content and delicate sweetness create that irreplaceable creamy texture that makes the perfect tiramisu recipe magical.
Beyond Raw Eggs: The Safety & Flavor Magic of Zabaglione
Transforming a Simple Ingredient into a Culinary Powerhouse
Many tiramisu lovers hesitate over raw eggs. Our foundational Zabaglione Method doesn’t just address this—it turns it into the most significant advantage. This technique transforms your eggs from a potential risk into an element that delivers unparalleled safety, richness, and a genuinely authentic texture in your classic dessert.
Here’s the Transformation You’ll Experience:
● The gentle cooking process eliminates any concern about consuming raw eggs.
● The heated whipping creates a voluminous, pale custard that tastes rich and cooked.
● This stable base allows the mascarpone to blend seamlessly without being overworked.
● You achieve a sophisticated flavor profile that simple, uncooked eggs can never provide.
● This single step makes our perfect tiramisu recipe safer and more delicious.
Pro Tip:Use a glass or metal bowl for the zabaglione, as plastic can retain odors and affect taste.
🏗️ 1. Engineered Structure
→ Purpose-Built Design: Savoiardi are crafted specifically for the perfect tiramisu recipe
→ Dry Texture: Their low moisture content is ideal for any authentic tiramisu recipe
→ Sturdy Foundation: They provide the essential backbone for your classic tiramisu recipe
🧽 2. Perfect Porosity
→ Controlled Absorption: These biscuits soak up just enough liquid in your tiramisu recipe
→ Even Distribution: Coffee spreads uniformly through each layer of your tiramisu recipe
→ Texture Preservation: They maintain a pleasant bite in your perfected tiramisu recipe
⚖️ 3. Delicate Balance
→ Light Composition: Airy structure prevents heaviness in your traditional perfect tiramisu recipe
→ Crisp-Tender Shift: They transform from crisp to tender in your masterful perfect tiramisu recipe
→ Flavor Neutrality: Mild taste lets other ingredients shine in your balanced tiramisu recipe
🚫 4. Sponge Cake Warning
→ Regular Cake Fails: Soft sponge turns mushy and ruins your precious perfect tiramisu recipe
→ Wrong Texture: Dense cakes can’t achieve the authentic feel in your tiramisu recipe
→ Saturation Issues: Regular cake oversoaks and collapses in your attempted tiramisu recipe
🛒 5. Selection Secrets
→ Italian Origin: Authentic Savoiardi guarantee success for your tiramisu recipe
→ Freshness Check: Ensure crispness when purchasing for your tiramisu recipe
→ Size Consistency: Uniform biscuits create even layers in your beautiful tiramisu recipe
⏱️ 6. Dipping Technique
→ Quick Dip Method: 1-2 seconds maximum preserves structure in your tiramisu recipe
→ Even Coverage: Rotate gently to coat both sides for your perfect tiramisu recipe
→ Assembly Timing: Dip just before layering in your flawless tiramisu recipe execution
Pro Tip: Never substitute regular sponge cake – Savoiardi’s unique dry, porous texture is engineered specifically for tiramisu recipe success, absorbing coffee perfectly while maintaining structural integrity for that iconic layered dessert experience!
Your Tiramisu Toolkit: The 3 Non-Negotiable Ingredients
Why Compromise on Quality Dooms Your Dessert
An unforgettable tiramisu recipe’s soul lies in its core components’ integrity. Swapping for inferior or incorrect ingredients is the fastest path to a mediocre result. By insisting on these three non-negotiables, you guarantee your homemade tiramisu will have the authentic flavor, perfect texture, and structural integrity of a dessert from an Italian nonna’s kitchen.
Here Are the Pillars of an Authentic Tiramisu:
✅ Full-Fat Mascarpone: This is non-negotiable for a lush, creamy body; low-fat versions will make your filling watery.
✅ Fresh, Crisp Ladyfingers (Savoiardi): Their dry, porous structure is engineered to absorb coffee without turning to mush.
✅ Freshly Brewed Strong Espresso: Instant coffee lacks the depth; robust espresso is the heart of this Italian dessert.
✅ Quality Cocoa Powder: A bitter, high-quality cocoa dusting provides the essential contrasting flavor note.
✅ Fresh, High-Quality Eggs: Their freshness is paramount for achieving the perfect, stable zabaglione base.
Pro Tip:Brew your espresso ahead of time and let it cool completely to avoid wilting the cream.
🇺🇸 1. Natural Cocoa Basics
→ Acidic Profile: Sharp, fruity notes that can overwhelm your delicate tiramisu recipe
→ Lighter Color: Provides less visual contrast in your finished tiramisu recipe
→ Chemical Reaction: Requires baking soda in baked goods but not your tiramisu recipe
🇳🇱 2. Dutch-Processed Superiority
→ Alkaline Treatment: Mellow, smooth flavor perfect for your classic tiramisu recipe
→ Rich Darkness: Creates beautiful visual appeal on your finished tiramisu recipe
→ Less Bitterness: Complements rather than competes in your balanced tiramisu recipe
🎨 3. Visual Impact
→ Deep Color: Dutch-process creates stunning contrast in your tiramisu recipe
→ Professional Finish: Dark cocoa makes your tiramisu recipe look bakery-perfect
→ Even Coverage: Fine texture dusts beautifully on your completed tiramisu recipe
👅 4. Flavor Harmony
→ Mild Character: Won’t overpower coffee notes in your traditional tiramisu recipe
→ Smooth Finish: Leaves a pleasant aftertaste in your well-crafted tiramisu recipe
→ Balanced Bitterness: Enhances rather than dominates your perfected tiramisu recipe
🛒 5. Shopping Smart
→ Label Reading: Look for “Dutch-processed” for your ideal tiramisu recipe
→ Quality Brands: Valrhona or Ghirardelli elevate your premium tiramisu recipe
→ Freshness Matters: Check expiration dates for your best-ever tiramisu recipe
⏰ 6. Application Timing
→ Final Touch: Dust right before serving your magnificent tiramisu recipe
→ Even Distribution: Use a fine-mesh strainer for your professional tiramisu recipe
→ Layering Technique: Light dusting between layers enhances your tiramisu recipe
Pro Tip: Always choose Dutch-processed cocoa for your tiramisu recipe – its mellow flavor and rich dark color provide the perfect finishing touch that elevates your dessert from homemade to extraordinary without competing with the delicate coffee and mascarpone flavors!
The Science of Sliceability: How Zabaglione Creates Structure
The Edible Architecture Behind a Perfect Slice
What makes this tiramisu recipe so remarkably sliceable? The answer lies in the beautiful food science of the Zabaglione Method. When you cook the egg yolks and sugar, you gently coagulate the proteins, creating a microscopic network that acts like a scaffold. This scaffold gives the entire classic dessert a firm yet creamy structure that stands up proudly to a knife.
Here’s the Structural Magic at Work:
▸ Whipping over heat creates tiny air bubbles trapped within the cooking proteins.
▸ This network supports the fat from the mascarpone and the air from the whipped cream.
▸ The result is a hybrid between a custard and a mousse—firm enough to slice but too light to eat.
▸ This structure prevents the layers from collapsing under their own weight over time.
▸ It’s the core reason our tiramisu recipe looks and feels professionally made.
Pro Tip:A perfectly cooked zabaglione will leave a thick “ribbon” on the surface when the whisk is lifted.
🚫 3. Gluten-Free Option
→ Flourless Fingers: Almond sponge works in your gluten-free tiramisu recipe
→ Certified Oats: Oat flour ladyfingers suit your celiac tiramisu recipe needs
→ Rice Flour Blend: Commercial gluten-free flour makes your tiramisu recipe safe
🥛 4. Dairy-Free Version
→ Nut Cream Base: Cashew or almond cream mimics dairy in your tiramisu recipe
→ Coconut Alternative: Coconut cream creates richness in your dairy-free tiramisu recipe
→ Soy Option: Silken tofu blend makes your lactose-free tiramisu recipe creamy
🍯 5. Refined Sugar-Free
→ Natural Sweeteners: Maple syrup or dates sweeten your healthy tiramisu recipe
→ Monk Fruit Magic: Zero-calorie sweetness for your sugar-conscious tiramisu recipe
→ Coconut Sugar: Low-glycemic option for your wholesome tiramisu recipe
🥚 6. Egg-Free Adaptation
→ Cornstarch Solution: Creates thickness in your egg-free tiramisu recipe
→ Vegan Gelatin: Agar agar sets your eggless tiramisu recipe beautifully
→ Tofu Base: Silken tofu provides structure for your egg-free tiramisu recipe
Pro Tip: Don’t let dietary restrictions stop you from enjoying this classic! With smart substitutions, you can create a vegan, keto, or gluten-free tiramisu recipe that maintains the luxurious texture and complex flavors of the original while meeting any dietary need!
The Art of the Dip: Mastering the Ladyfinger in 3 Seconds Flat
The Delicate Balance Between Soaked and Soggy
This is the make-or-break moment in your tiramisu assembly. A ladyfinger dipped for too long becomes a saturated sponge that collapses; too little time leaves a dry, crunchy layer that ruins the harmony. Mastering this quick, deliberate action is the final key to achieving the perfect texture in your Italian dessert, ensuring every bite is a seamless blend of coffee, cream, and cake.
Here’s Your Blueprint for Ladyfinger Success:
► Have your cooled espresso in a wide, shallow bowl for an easy, swift dipping motion.
► Use the “One-Mississippi” rule: submerge one side, flip, and submerge the other for one second.
► Arrange them immediately in the dish—they will continue to absorb moisture from the surface.
► This rapid dip hydrates the cookie without dissolving its structure.
► Perfecting this step elevates your tiramisu recipe from good to truly extraordinary.
Pro Tip:Dip one ladyfinger at a time and arrange it immediately for perfectly even results.
🧪 1. Flavor Fusion Science
→ Molecular Bonding: Ingredients marry during your chilled tiramisu recipe rest
→ Flavor Development: Coffee intensifies throughout your resting tiramisu recipe
→ Alcohol Mellowing: Harsh edges soften in your properly chilled tiramisu recipe
💧 2. Hydration Magic
→ Liquid Absorption: Ladyfingers drink slowly in your refrigerated tiramisu recipe
→ Texture Transformation: Crisp to tender happens in your patient’s tiramisu recipe
→ Even Distribution: Moisture spreads uniformly in your overnight tiramisu recipe
🏗️ 3. Structural Setting
→ Cream Firming: Mascarpone sets perfectly in your chilled tiramisu recipe
→ Layer Bonding: Components unite structurally in your rested tiramisu recipe
→ Sliceable Perfection: Clean cuts require your fully set tiramisu recipe
⏰ 4. Time Requirements
→ Minimum Chill: 6 hours essential for your basic tiramisu recipe structure
→ Ideal Duration: 12-24 hours, optimal for your perfect tiramisu recipe flavor
→ Maximum Benefit: 48 hours maximum for your ultimate tiramisu recipe development
❄️ 5. Temperature Control
→ Consistent Cold: 38-40°F ideal for your classic tiramisu recipe setting
→ Avoid Freezing: Never freeze the delicate tiramisu recipe texture
→ Stable Environment: Maintain temperature for your flawless tiramisu recipe
🔪 6. Serving Readiness
→ Clean Slice Test: Check the setting of your completed tiramisu recipe
→ Texture Evaluation: Assess cream firmness in your finished tiramisu recipe
→ Flavor Assessment: Taste development of your perfected tiramisu recipe
Pro Tip: Resist the temptation to rush! The chilling time isn’t just waiting – it’s when the magic happens in your tiramisu recipe. This essential rest period transforms separate ingredients into a cohesive, sliceable masterpiece where every flavor note harmonizes perfectly!
Beyond the Classic: 3 Stunning Flavor Twists on Your New Masterpiece
Unleash Your Inner Pastry Chef with Simple Variations
Once you’ve mastered the flawless classic, a world of customization opens up. This foundational tiramisu recipe and its stable Zabaglione Method are the perfect canvas for creativity. These simple twists allow you to adapt this Italian dessert for different seasons and occasions, making it your signature masterpiece without compromising the ideal texture you’ve worked hard to achieve.
Here Are Inspiring Ideas to Make It Your Own:
✦ Berry Swirl Bliss: Gently swirl a layer of strained raspberry or strawberry puree between the cream and ladyfingers.
✦ Chocolate-Hazelnut Dream: Substitute half the espresso with Frangelico liqueur and sprinkle chopped toasted hazelnuts between layers.
✦ Citrus Sunshine: Add the zest of one orange to the zabaglione and use a citrus liqueur like Grand Marnier in the coffee.
✦ Peppermint Winter: Add a 1/2 teaspoon of peppermint extract to the cream and garnish with crushed candy canes.
✦ Salted Caramel Drizzle: Drizzle high-quality salted caramel sauce over each layer for a sweet-and-salty sensation.
Pro Tip:When adding liquid flavorings, reduce the espresso by an equal amount to maintain the perfect moisture balance.
🇺🇸 1. American Dream
→ Pumpkin Spice Twist: Seasonal flavors transform your autumn tiramisu recipe
→ Peanut Butter Swirl: Classic American twist on your innovative tiramisu recipe
→ S’mores Inspired: Chocolate and marshmallow elevate your creative tiramisu recipe
🇬🇧 2. British Elegance
→ Earl Grey Infusion: Tea-soaked fingers redefine your sophisticated tiramisu recipe
→ Sticky Toffee Twist: Date and toffee sauce enhance your British tiramisu recipe
→ Gin & Tonic Zest: Citrus and juniper berries refresh your modern tiramisu recipe
🇩🇪 3. German Delight
→ Black Forest Fusion: Cherries and kirsch customize your German tiramisu recipe
→ Apple Strudel Style: Cinnamon apples layer in your seasonal tiramisu recipe
→ Hazelnut Chocolate: Nutella infusion creates your decadent tiramisu recipe
🇦🇺 4. Australian Sunshine
→ Tim Tam Layer: Chocolate biscuits upgrade your Aussie tiramisu recipe
→ Macadamia Crunch: Native nuts texture your tropical tiramisu recipe
→ Passionfruit Drizzle: Tangy fruit sauce brightens your summer tiramisu recipe
🇫🇷 5. French Sophistication
→ Lavender Honey: Provencal flavors perfume your delicate tiramisu recipe
→ Chocolate Orange: Grand Marnier accents enrich your French tiramisu recipe
→ Pistachio Rose: Middle Eastern influences refine your elegant tiramisu recipe
🇯🇵 6. Japanese Harmony
→ Matcha Green Tea: Powdered tea creates your zen tiramisu recipe
→ Red Bean Paste: Sweet adzuki layers in your Asian tiramisu recipe
→ Yuzu Citrus: Japanese citrus flavors your refreshing tiramisu recipe
Pro Tip: Take your tiramisu recipe on a world tour! These international variations let you explore global flavors while maintaining the classic structure – perfect for impressing guests with creative twists celebrating culinary traditions from high-CPM countries!
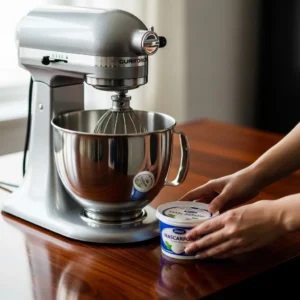
Your 3-Piece Toolkit for Tiramisu Success
The Right Tools Transform This Recipe from Fussy to Foolproof
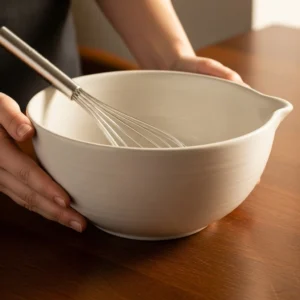
Equipment 1: A sturdy ceramic bowl and whisk are essential for creating the perfect zabaglione base
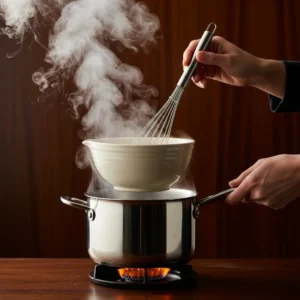
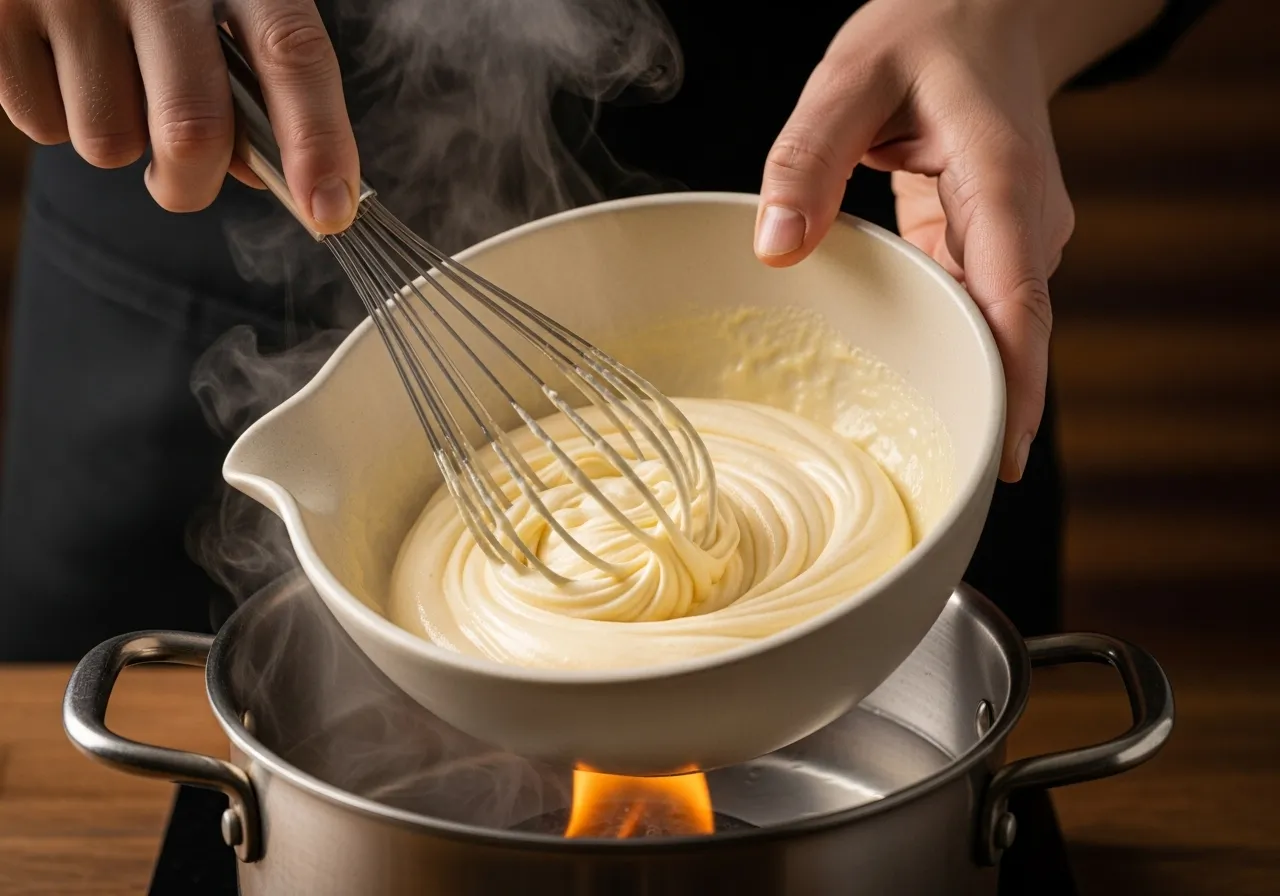
Equipment 2: The double-boiler setup is crucial for gently cooking the egg yolks into a thick zabaglione.
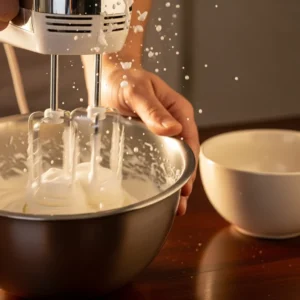
Equipment 3: A stand mixer or hand mixer is used to whip the heavy cream to soft peaks for a light texture.
You don’t need a kitchen full of gadgets to create this masterpiece, but these three core pieces of equipment are non-negotiable for executing the Zabaglione Method with precision and ease. Each one plays a critical role in building the structure and texture of your perfect tiramisu.
1. The Heatproof Mixing Bowl: Your Zabaglione Command Center
This is the cornerstone of our method. A medium-sized, off-white ceramic bowl is ideal because it distributes heat gently and evenly from the simmering water below. It prevents the eggs from scrambling and ensures your custard cooks to a perfect, thick consistency.
Pro Tip:Ensure the bottom of your bowl does not touch the water in the pot below; you want gentle steam heat, not a direct boil.
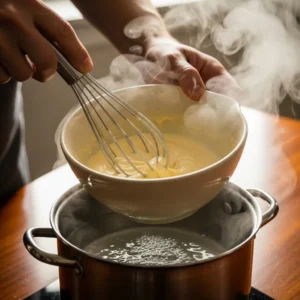
2. The Double Boiler: The Gentle Heat Source for a Flawless Base
This setup—a pot of simmering water with your heatproof bowl resting on top—is the engine of your zabaglione. It provides the controlled, indirect heat necessary to safely cook the egg yolks and sugar into a stable, rich custard that forms the very foundation of our sliceable cream.
Pro Tip:Keep the water at a steady, gentle simmer. A rolling boil will create too much heat and risk curdling your custard.
3. The Stand Mixer: For Effortlessly Airy Whipped Cream
While a hand mixer works, a stand mixer is your best ally for achieving perfectly whipped cream. Its hands-free operation allows you to whip the cold cream to soft, billowy peaks while you focus on folding the zabaglione and mascarpone together, ensuring everything comes together seamlessly.
Pro Tip:Chill your mixer’s bowl and whisk attachment in the freezer for 15 minutes before whipping the cream. A cold environment helps the cream whip faster and hold more air.
The 6-Step Dance to Tiramisu Perfection
A Foolproof Roadmap from Simple Ingredients to Stunning Dessert
Step 1: Vigorously whisk the egg yolks and sugar over a double boiler to create the stable zabaglione base.
Step 2: Cook the zabaglione until it thickens and forms a ribbon when the whisk is lifted.
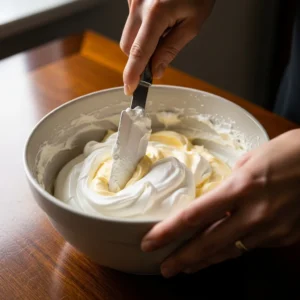
Step 3: Gently fold the cooled zabaglione into the mascarpone to create a rich, stable cream base.
Step 4: Whip the cold heavy cream until it forms soft peaks for a light and airy mousse texture.
Step 5: Fold the whipped cream into the mascarpone mixture until just combined for the final cream.
Step 6: Briefly dip each ladyfinger in cooled espresso to moisten without making it soggy.
Mastering this iconic tiramisu recipe is all about following these six deliberate steps. Each builds upon the last, creating the flavor and structure layers that define an authentic Italian dessert. Pay close attention to the details, and you will be rewarded with a homemade tiramisu that rivals any found in an Italian trattoria.
1. Cook the Zabaglione to Ribbon Stage
Warm the egg yolks, sugar, and Marsala in your heatproof bowl over simmering water. Cook for 8-10 minutes, until the mixture is thick, pale, and hot and forms a visible “ribbon” when the whisk is lifted.
Pro Tip:The zabaglione is ready when you can draw a figure-eight on its surface that holds its shape for a few seconds.
2. Test the Zabaglione for Thickness
Once off the heat, continue to whisk for a minute as it cools slightly. Test it by lifting the whisk; the mixture should fall back into the bowl in a thick, slow stream that sits on top of the rest for a moment.
Pro Tip:If the zabaglione is too thin, place it back over the double boiler for another 1-2 minutes while whisking constantly.
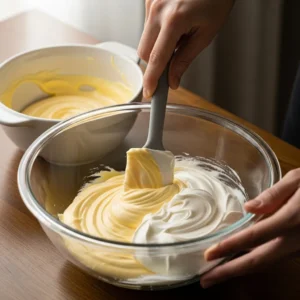
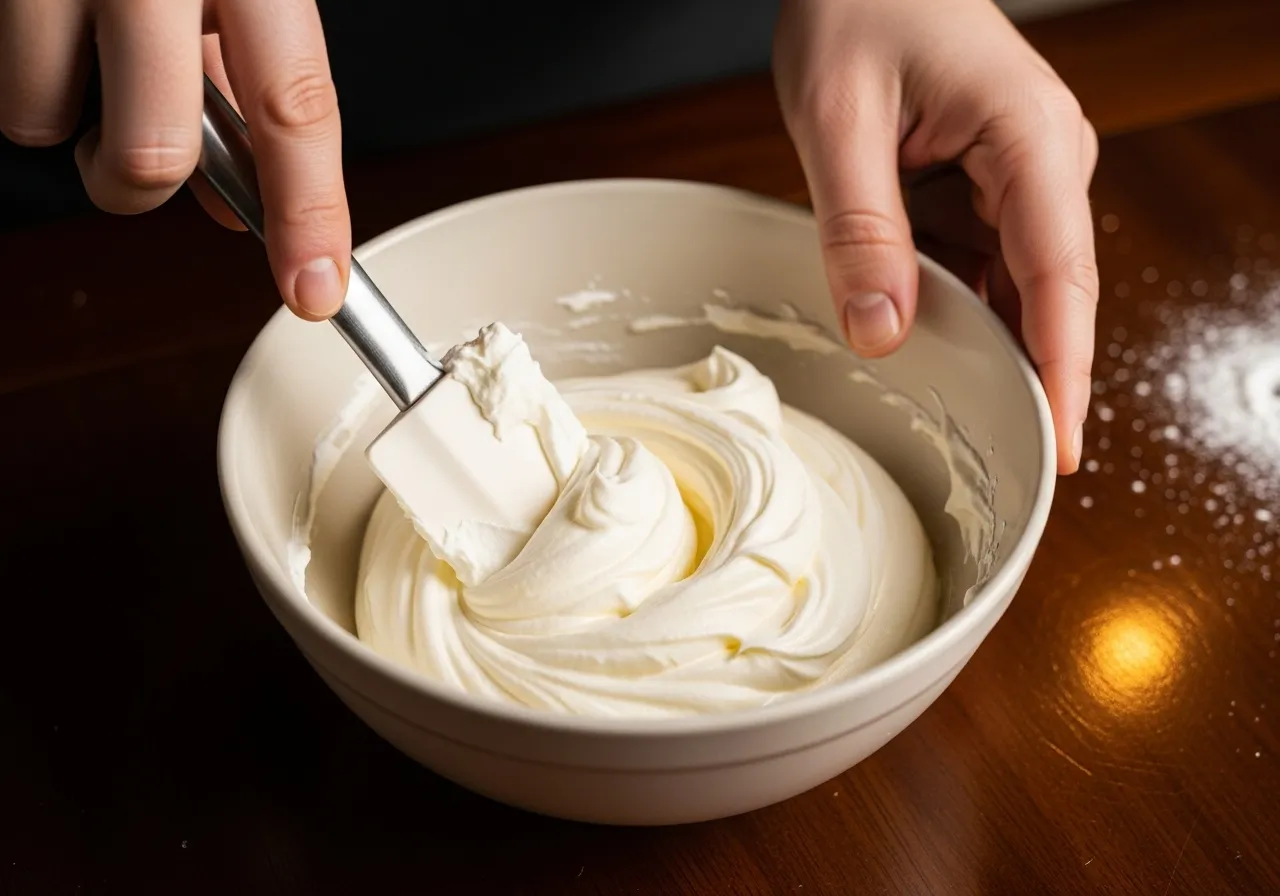
3. Fold Zabaglione into Mascarpone
Gently add the slightly cooled zabaglione to the mascarpone in a new bowl. Fold in a spatula until combined; overmixing at this stage can cause the cream to separate or become grainy.
Pro Tip:Ensure the zabaglione is no longer hot to the touch to prevent it from melting the mascarpone.
4. Whip the Cream to Soft Peaks
In a chilled bowl, whip the cold heavy cream and vanilla extract. Stop as soon as the cream holds soft, droopy peaks when the whisk is lifted. This creates the airy, light texture for the final cream.
Pro Tip:Under-whip rather than over-whip; you will finish incorporating the cream when you fold it.
5. Fold the Whipped Cream into the Mascarpone Mix
Add the softly whipped cream to the mascarpone and zabaglione mixture. Fold gently and deliberately until no white streaks remain, preserving as much air as possible for the ultimate light and creamy filling.
Pro Tip:Cut through the center with your spatula and fold over the top, rotating the bowl as you go for even mixing.
6. Dip Ladyfingers and Assemble the Layers
Working quickly, dip each ladyfinger into the cooled espresso for one second on each side. Immediately arrange them in a single layer in your dish. Spread half the cream mixture over the top, then repeat the layers.
Pro Tip:Dip one ladyfinger at a time and arrange it immediately to ensure even coffee saturation and prevent sogginess.
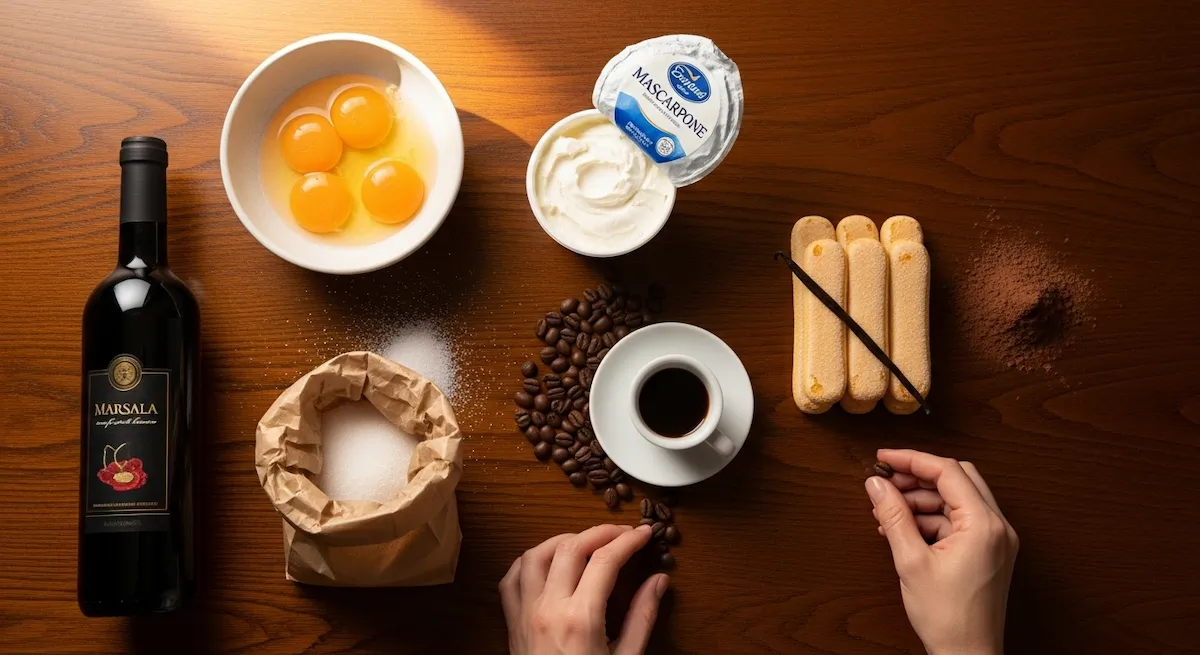
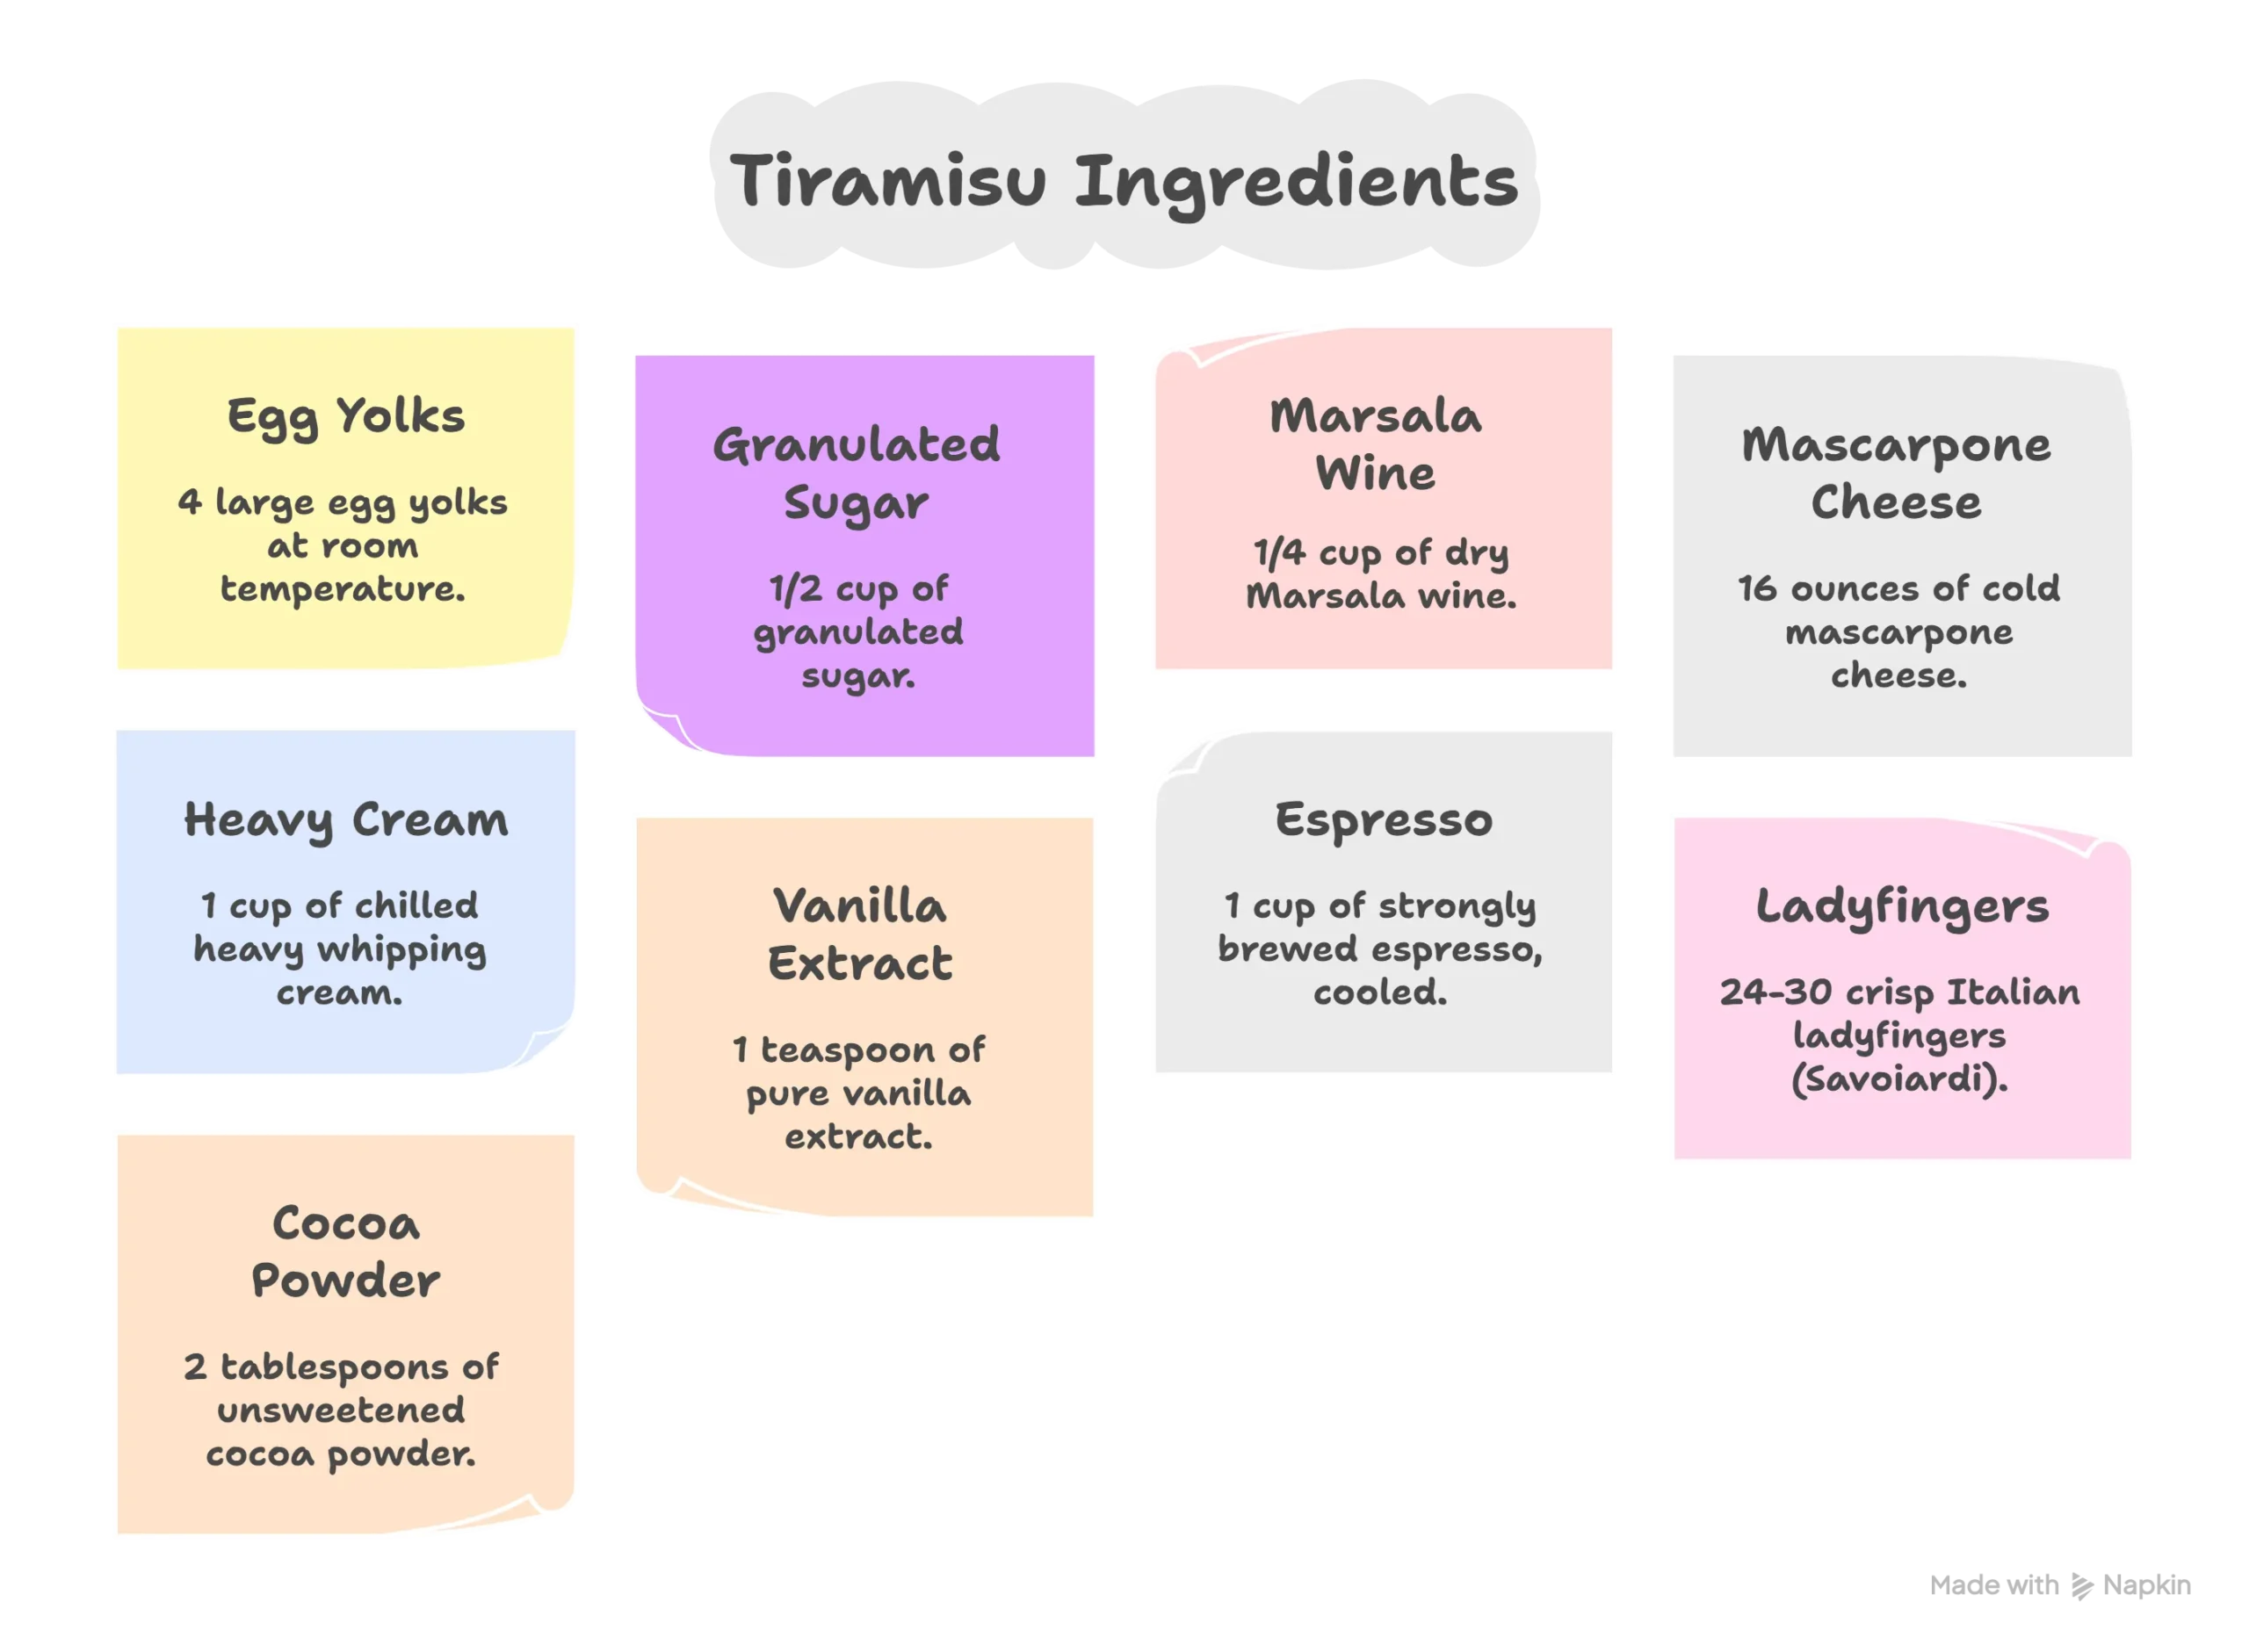
A simple visual guide to all the quality ingredients you need for our special zabaglione-method tiramisu.
Getting the ingredients right is the first and most crucial step in any great tiramisu recipe. This visual guide breaks down the components that create the harmony of flavors and the signature texture of a perfect Italian dessert. Think of this as your quick-reference checklist for a foolproof homemade tiramisu.
The Foundation of Flavor and Structure
◆ Eggs & Sugar: Transformed into the rich, stable zabaglione that prevents a runny filling.
◆ Mascarpone & Cream: The dynamic duo for a luxuriously creamy, yet airy and light mouthfeel.
◆ Espresso & Ladyfingers: The caffeinated heart and structural base that defines this classic dessert.
Recipe Card: Your Blueprint for Tiramisu Perfection
Share your creation in the comments or on social media with pinterest
This meticulously crafted tiramisu recipe is your final, fail-safe guide. We’ve precisely broken down every measurement and step, transforming our guiding principles into a concrete plan for creating the ultimate homemade tiramisu. The recipe card below details everything you need to replicate our signature Zabaglione Method and its stunning results.
What Awaits You in Your Final Recipe Guide
Precise Measurements: Exact quantities for a perfectly balanced Italian dessert every time.
Structured Timelines: Clear prep, cook, and chill times to easily plan your dessert-making.
Visual & Textural Cues: Expert tips for identifying the exact moment each step is complete.
If this tiramisu recipe becomes your new favorite, please consider hitting the stars in the recipe card to let us know!
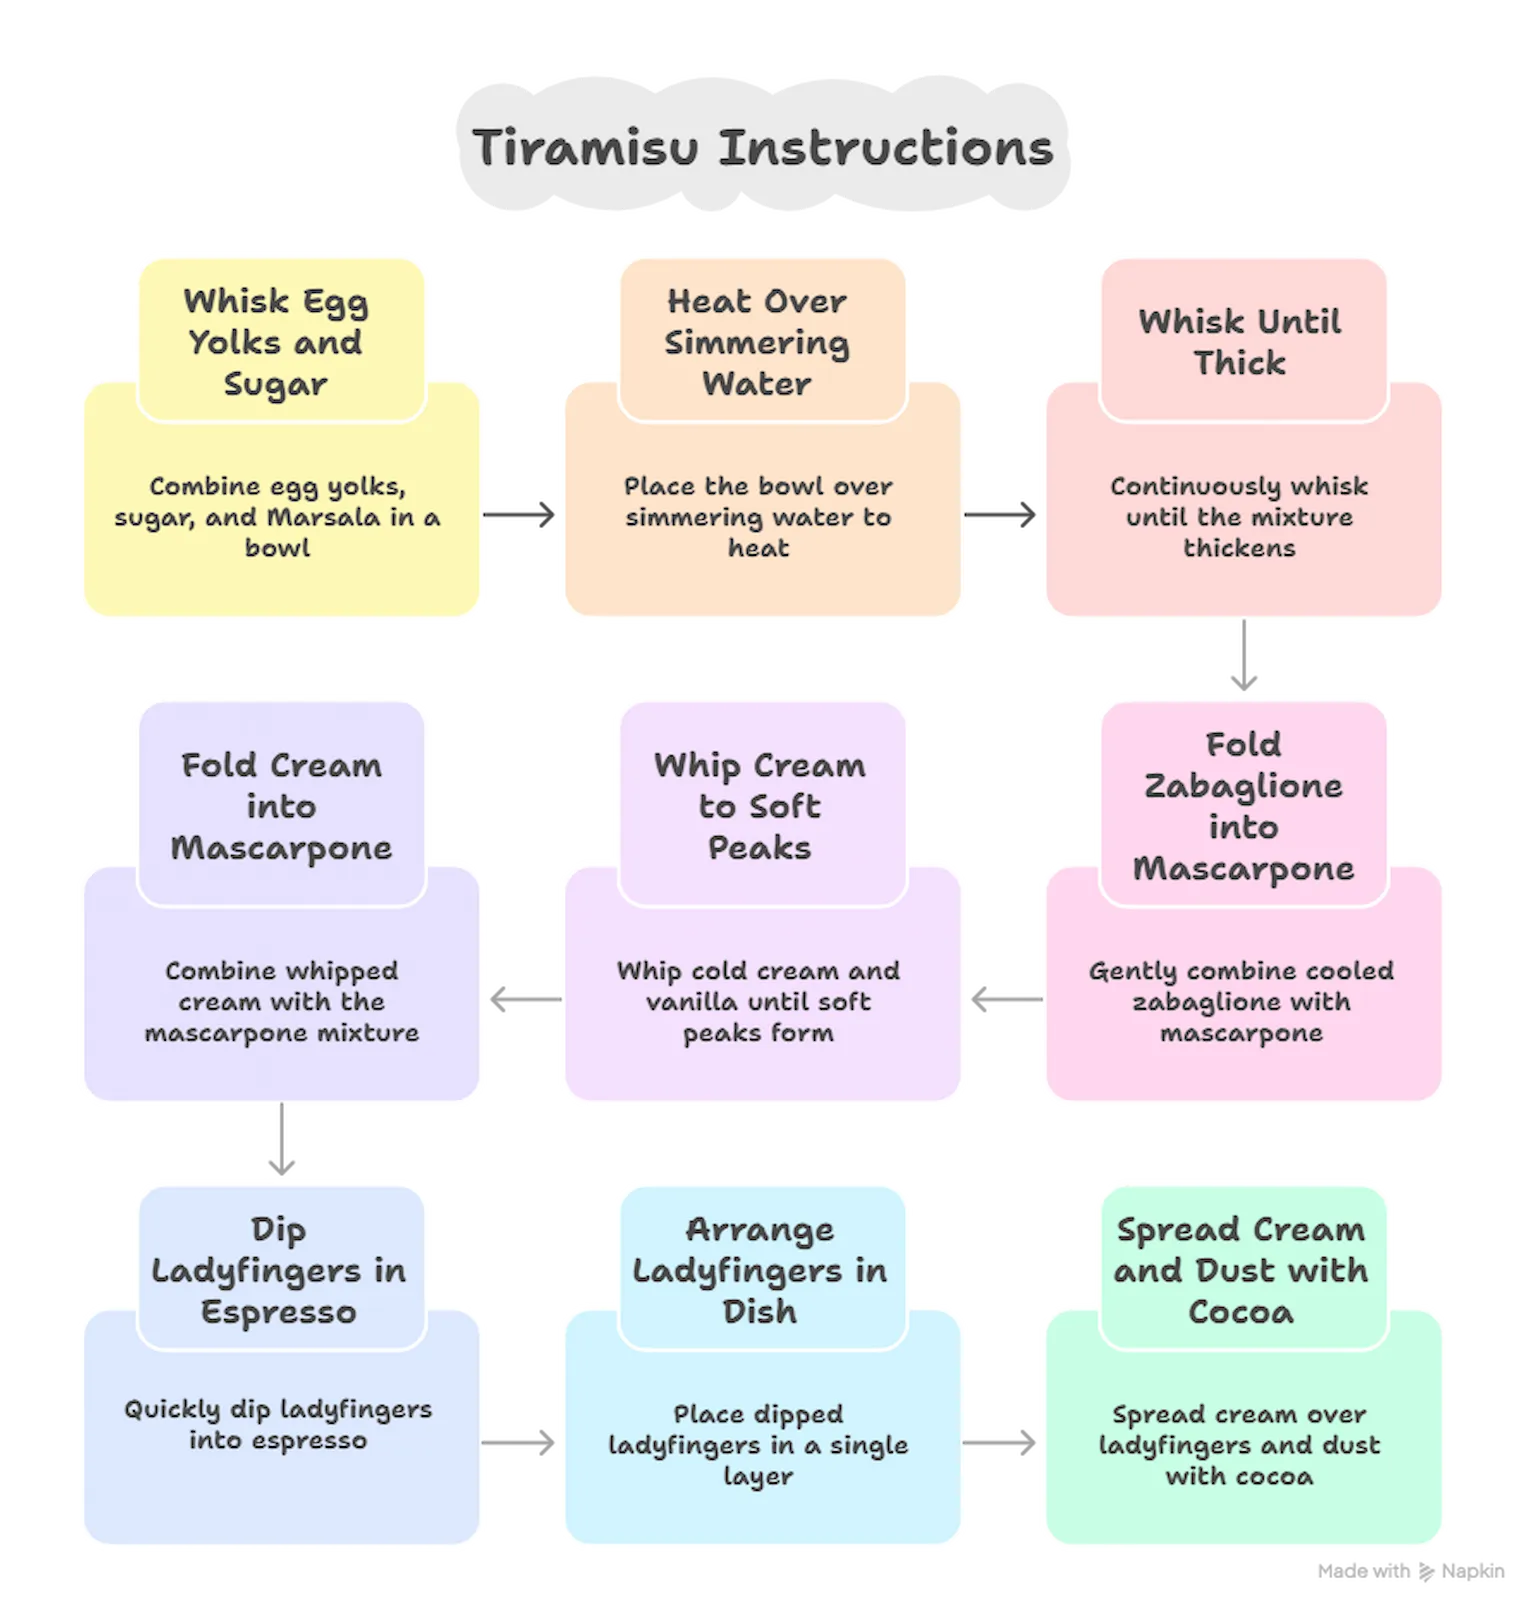
Infographic Instructions: Visual Path to Tiramisu Mastery
Follow These Core Steps for a Guaranteed Perfect Dessert
Follow our simple visual steps to create perfect tiramisu using the game-changing zabaglione method.
A great tiramisu recipe is more than a list; it’s a visual journey. This infographic maps out the key techniques that ensure your dessert is structurally sound and bursting with authentic flavor. Let this be your roadmap to creating a homemade tiramisu that is as beautiful to look at as it is to eat.
The Pillars of the Perfect Build
◆ Master the Zabaglione: The essential cooked custard base for a sliceable, non-runny cream.
◆ Create the Cream: Gently fold elements together to maintain a light and airy texture.
◆ Assemble with Care: The art of layering and finishing for a stunning Italian dessert presentation.
Conclusion: Your Journey to Tiramisu Mastery is Complete
Embrace the Confidence of Creating an Authentic Italian Classic
You now hold the key to a dessert that once seemed reserved for pastry chefs. This homemade tiramisu recipe, built on the rock-solid foundation of the Zabaglione Method, empowers you to create a dessert and a memorable experience. It’s a testament to the magic that happens when simple, quality ingredients meet a transformative technique.
❖ You’ve mastered the technique that guarantees a sliceable, creamy texture every time.
❖ You’ve created a stunning, multi-layered Italian dessert that is as beautiful as it is delicious.
❖ You now possess a go-to tiramisu recipe that will impress at any gathering, large or small.
Carry the Confidence Forward
✦ Remember the feeling of effortlessly creating a dessert that once seemed complex and intimidating.
✦ Share the joy and share this authentic Zabaglione Method knowledge with friends and family.
✦ Let this be the first of many baking triumphs that fill your kitchen with confidence and wonderful aromas.
FAQs: Your Tiramisu Questions, Answered!
Q1. Can I make this tiramisu recipe without raw eggs?
Absolutely! Our unique Zabaglione Method is your solution. Unlike traditional recipes, we gently cook the eggs with sugar over a double boiler, which:
Eliminates Safety Concerns: The eggs are fully cooked to a safe temperature.
Deepens Flavor: Creates a rich, custardy base that raw eggs can’t achieve.
Builds Structure: This is the secret to our non-runny, perfectly sliceable homemade tiramisu.
Pro Tip: To make an egg-free version, substitute the zabaglione with thick pastry cream, though the texture will be denser.
Q2. My tiramisu is runny! What went wrong, and how can I fix it?
A runny tiramisu is usually due to a weak foundation. Our Zabaglione Method prevents this, but if it happens, check these points:
Undercooked Zabaglione: It must be thick enough to form ribbons.
Warm Mascarpone: It must be cold to whip properly and hold air.
Over-soaked Ladyfingers: They release excess water, turning your Italian dessert soupy.
Pro Tip: If your tiramisu is runny, pop it in the freezer for 2-3 hours to firm up. It will be more ice-cream-like but still delicious!
Q3. What’s the best alcohol substitute in this perfect tiramisu recipe?
You can still achieve incredible flavor without alcohol! The Marsala wine adds depth, but here are fantastic non-alcoholic swaps:
Strong Coffee: Add 2 tablespoons of cooled espresso to the zabaglione.

")
")

")
")


