A neatly arranged flat lay of all ingredients needed for the recipe, including chicken, broccoli, bell pepper, coconut aminos, ginger, and baking soda.
Naturally Gluten-Free, Incredibly Quick & Family Approved
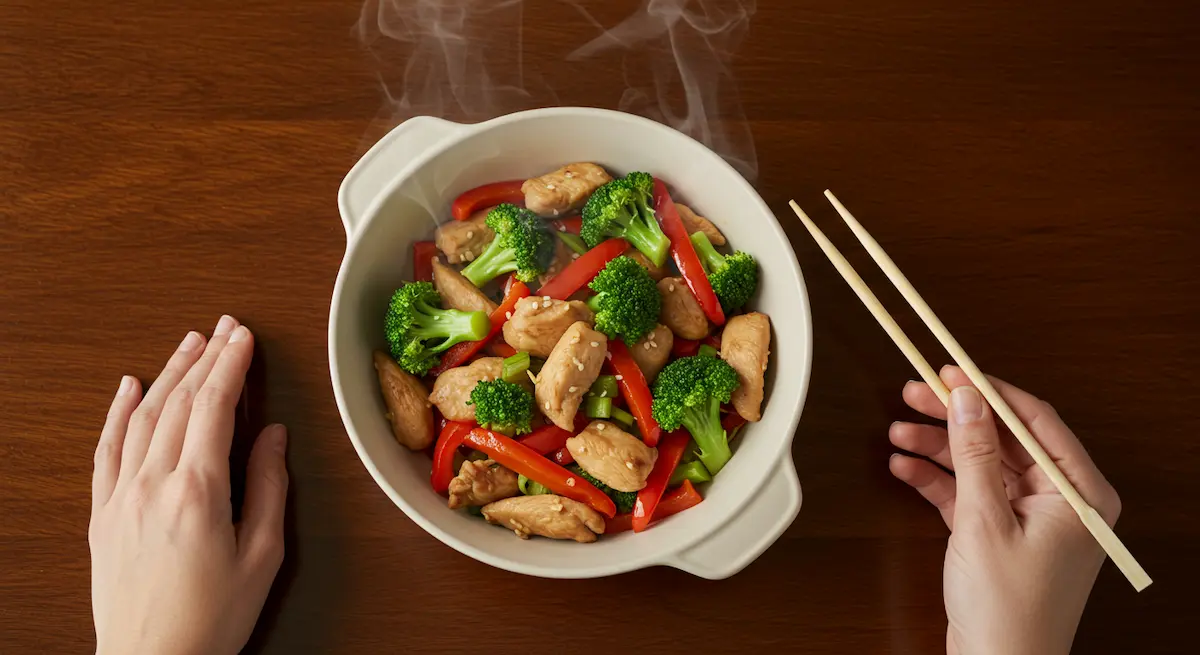
Tired of bland, rubbery poultry and complicated recipes that promise restaurant results but never deliver? This healthy chicken stir-fry is your answer, featuring a revolutionary velveting technique for impossibly tender meat and a flavorful homemade sauce—all ready in minutes. It’s the guaranteed solution for a quick, nutritious, and satisfying dinner that will become a weekly staple in your home.
Why This Recipe Changes Everything
Before you heat your wok… here’s what makes this method a total game-changer for busy weeknights and health-conscious foodies alike.
Restaurant Results, Home Kitchen Simplicity
Velveting Magic: A simple baking soda trick transforms ordinary chicken into the most tender, juicy protein you’ve ever tasted.
Sauce from Scratch: A quick, gluten-free sauce made with coconut aminos and fresh ginger—no processed bottles needed.
30-minute promise: From prep to plate in half an hour for a stress-free, healthy dinner solution.
Guaranteed Wholesome & Delicious
Dietary friendly: Naturally free from gluten and easily adaptable to be low-sodium.
Veggie-packed: Loaded with fresh broccoli and crisp bell peppers for a nutritious, balanced meal.
Meal-prep champion: Cooks once and enjoys flavorful, reheatable lunches all week.
Pro Tip:For flawlessly tender chicken, rinse the velveted meat thoroughly and pat it completely dry before cooking.
Why This Recipe is Naturally Safe for Gluten-Sensitive Diets
🥥 1. Coconut Aminos
→ Gluten Status: Naturally gluten-free, unlike traditional soy sauce
→ Why It Works: Made from coconut blossom nectar and sea salt
→ Verification: Always check labels for certified gluten-free certification
🧂 2. Baking Soda
→ Gluten Status: Pure mineral (sodium bicarbonate) with no gluten-containing additives
→ Why It Works: Simple chemical compound without grain derivatives
→ Verification: Most brands are inherently gluten-free, but check for cross-contamination warnings
🥦 3. Fresh Vegetables
→ Gluten Status: Whole, unprocessed foods that are inherently gluten-free
→ Why It Works: Broccoli, bell peppers, and garlic contain no gluten proteins
→ Verification: Always wash thoroughly to remove any potential cross-contact
🍗 4. Chicken Breast
→ Gluten Status: Naturally gluten-free whole protein source
→ Why It Works: Plain poultry contains no gluten-containing ingredients
→ Verification: Check for added solutions or marinades that might contain gluten
🍊 5. Fresh Orange Juice
→ Gluten Status: Naturally pressed citrus juice is gluten-free
→ Why It Works: Extracted directly from fruit with no grain-based additives
→ Verification: Avoid bottled juices with added flavors or stabilizers
🌰 6. Toasted Sesame Oil
→ Gluten Status: Pure oil extracted from sesame seeds, naturally gluten-free
→ Why It Works: Oils are distilled products that don’t contain gluten proteins
→ Verification: Check for added flavorings or processing aids that might contain gluten
Pro Tip: Always check labels on pre-packaged goods like baking soda and coconut aminos to ensure they’re certified gluten-free and processed in dedicated facilities, especially if you have celiac disease or severe sensitivity.
The Science of Velveting: Why This Method is a Game-Changer
The secret behind your favorite restaurant’s impossibly tender meat Transforms Texture, Locks in Moisture & Is Surprisingly Simple
This simple technique is the secret behind your favorite restaurant’s tender meat. A brief baking soda marinade alters the chicken’s pH, allowing it to retain incredible moisture during high-heat cooking.
Why Your Chicken Will Never Be Rubbery Again
➤ pH Power: The alkaline marinade gently breaks down surface proteins for a more delicate bite.
➤ Moisture Lock: It helps the chicken proteins retain water, preventing them from seizing up and toughening.
➤ Sauce Adhesion: The slightly porous surface created by velveting allows sauces to cling better.
The Result You Can Expect
➢ Consistent Perfection: Guarantees a succulent texture that elevates your entire chicken stir-fry.
➢ Universal Application: This same method works wonders with tofu, beef, and shrimp.
➢ No Special Tools: Achieve gourmet results with a single bowl and 15 minutes of patience.
Pro Tip:For the most effective velveting, ensure your chicken is cut into uniform, half-inch strips to guarantee even marination and cooking.
Why This Method Transforms Ordinary Chicken into Restaurant-Quality Magic
🧪 1. The Alkaline Effect
→ Key Process: Baking soda (alkaline) raises the chicken’s surface pH level
→ Why It Works: This breaks down proteins gently, creating a delicate texture
→ Result: Chicken becomes more tender without becoming mushy
💧 2. Moisture Retention
→ Key Process: The altered protein structure traps moisture effectively
→ Why It Works: Creates “tiny pockets” that hold natural juices during cooking
→ Result: Chicken stays incredibly juicy even at high stir-fry temperatures
🔍 3. Surface Transformation
→ Key Process: Velveting creates a slightly porous surface on the chicken
→ Why It Works: This textured surface allows sauces to cling better
→ Result: Every bite is coated evenly with the flavorful sauce
⏱️ 4. The Timing Principle
→ Golden Rule: 15 minutes is the optimal marinating time
→ Why It Works: Enough time to transform texture without over-processing
→ Result: Perfect tender texture that holds up during cooking
🚰 5. The Rinsing Step
→ Crucial Step: Thorough rinsing removes all baking soda residue
→ Why It Works: Eliminates any potential soapy aftertaste completely
→ Result: Pure chicken flavor with perfectly tender texture
🍳 6. Cooking Response
→ Key Difference: Velveted chicken responds differently to heat
→ Why It Works: Seals in juices quickly while developing slight crispness
→ Result: Perfect contrast between tender interior and slight exterior texture
Pro Tip: For the most effective velveting, make sure your chicken is cut into uniform ½-inch pieces – this ensures even marination and cooking for consistently tender results in every bite.
Is This Recipe Truly Gluten-Free? How to Be 100% Sure
A meticulous guide to ensuring your meal is safe for celiac and gluten-sensitive diets From Label Checking to Avoiding Cross-Contamination
For those with celiac disease or a severe sensitivity, vigilance is key. This recipe is naturally gluten-free, but guaranteeing its safety requires a careful check of your ingredients and process.
The Hidden Gluten Checklist
➔ Baking Soda: While rare, some brands may be processed in facilities with wheat; choose a certified GF brand like Arm & Hammer.
➔ Coconut Aminos: Most are inherently gluten-free, but always check the label for any mention of wheat or gluten.
➔ Sesame Oil: Ensure it’s pure oil with no added flavorings or ingredients that might contain gluten.
The Cross-Contamination Protocol
➔ Dedicated Tools: Use a thoroughly cleaned wok, cutting board, and utensils that haven’t touched gluten-containing foods.
➔ Separate Condiments: Avoid double-dipping with spoons used for regular soy sauce or other gluten-containing products.
➔ Clean Surface: Wipe down your countertop before preparation to eliminate any lingering crumbs.
Pro Tip:For absolute certainty, designate a specific set of kitchen tools and a bottle of tamari or coconut aminos that are used only for gluten-free cooking.
Secret #3: 🔧 Common Stir-Fry Fails (And How to Fix Them)
Troubleshooting Guide for Perfect Stir-Fry Every Time
💦 1. Soggy Vegetables
→ The Problem: Vegetables release too much water and steam instead of searing
→ The Solution: Ensure the wok is smoking hot and don’t overcrowd the pan
→ Pro Tip: Pat vegetables completely dry before adding to the wok
🍗 2. Rubbery Chicken
→ The Problem: Chicken becomes tough, chewy, and loses moisture
→ The Solution: Don’t skip the velveting step and avoid overcooking
→ Pro Tip: Velvet for precisely 15 minutes and cook just until no longer pink
🥵 3. Burnt Garlic
→ The Problem: Garlic burns quickly and creates a bitter flavor
→ The Solution: Add garlic last and stir constantly for only 30 seconds
→ Pro Tip: Remove the wok from the heat when adding garlic to control cooking
🥘 4. Overcrowded Pan
→ The Problem: Ingredients steam instead of searing, losing texture
→ The Solution: Cook in batches if necessary to maintain high heat
→ Pro Tip: Ingredients should cover no more than ⅔ of the wok surface
🥣 5. Watery Sauce
→ The Problem: Sauce doesn’t thicken and coat ingredients properly
→ The Solution: Let the sauce simmer vigorously for 1-2 minutes to reduce
→ Pro Tip: Push ingredients aside to create a well for the sauce to reduce
🧂 6. Bland Flavor
→ The Problem: Stir-fry lacks depth and tastes one-dimensional
→ The Solution: Balance salty (coconut aminos), sweet (orange), and umami (sesame oil)
→ Pro Tip: Taste and adjust seasoning at the end with a splash of aminos or citrus
Pro Tip: For perfect stir-fry every time, prepare all ingredients before heating your wok – once cooking starts, everything happens too fast to chop or measure!
Coconut Aminos vs. Soy Sauce: A Health-Conscious Swapper’s Guide
Your roadmap to a gluten-free, lower-sodium sauce without sacrificing flavor Naturally Sweet, Rich in Umami & Allergen-Friendly
For a truly gluten-free and lower-sodium dish, coconut aminos are the ideal base for your sauce. This versatile condiment provides a rich, savory-sweet flavor without the wheat or intense saltiness.
Why Make The Switch?
■ Gluten-Free Guarantee: Derived from coconut sap, it’s a safe and delicious option for celiac diets.
■ Lower Sodium: Contains roughly 65% less sodium than traditional soy sauce, supporting heart health.
■ Subtle Sweetness: Its natural, mellow profile means you can often reduce or eliminate added sugars.
The Flavor Impact
□ Sauce Harmony: Creates a perfectly balanced glaze that clings beautifully to the velveted chicken.
□ Family-Friendly: Its less aggressive saltiness is a hit with kids and those with sensitive palates.
□ Pantry Staple: An invaluable ingredient for marinating, dipping, and dressing beyond this chicken stir-fry.
Pro Tip:If you only have soy sauce, use a 1:1 ratio but skip any added salt in the recipe to balance the sodium.
How to Make This Stir-Fry a Family Favorite for All Ages
🍗 1. Deconstructed Serving
→ Kid-Friendly Strategy: Serve components separately rather than mixed
→ Why It Works: Allows children to choose what they want to eat
→ Pro Tip: Use a divided plate to keep ingredients separate
🥣 2. Sauce on the Side
→ Kid-Friendly Strategy: Serve sauce as a dipping option rather than mixing it in
→ Why It Works: Kids love dipping and can control how much sauce they use
→ Pro Tip: Offer small individual dipping bowls for fun
🌶️ 3. Mild Flavor Profile
→ Kid-Friendly Strategy: Reduce or eliminate garlic and ginger for sensitive palates
→ Why It Works: Creates a milder flavor that’s less overwhelming
→ Pro Tip: Add a teaspoon of honey to the sauce for subtle sweetness
🍚 4. Familiar Bases
→ Kid-Friendly Strategy: Serve with white rice or noodles instead of brown rice
→ Why It Works: Offers familiar carbohydrates that kids already enjoy
→ Pro Tip: Use fun-shaped pasta to make the meal more appealing
🥕 5. Vegetable Adaptations
→ Kid-Friendly Strategy: Swap broccoli with sweet corn or peas
→ Why It Works: Uses vegetables that are typically more kid-approved
→ Pro Tip: Cut vegetables into smaller, more manageable pieces
👨👩👧👦 6. Involvement Strategy
→ Kid-Friendly Strategy: Let children assemble their own plates
→ Why It Works: Gives them a sense of control and ownership over their meal
→ Pro Tip: Create a “stir-fry bar” where kids can choose their components
Pro Tip: For a kid-friendly version, set aside some plain velveted chicken before adding sauce and serve with a side of sauce for dipping – this lets children enjoy the tender chicken with the option to dip rather than committing to a fully sauced dish!
“No-Soggy Vegetable” Rule: How to Achieve Perfect Crisp-Tender Texture
The chef’s secret to vibrant, crunchy vegetables every single time High Heat, Dry Veggies & Don’t Crowd the Pan
The key to vibrant, crisp-tender veggies is high heat and minimal crowding. Ensure your broccoli and bell peppers are completely dry before they hit the searing-hot wok.
The Golden Rules for Crisp Veggies
◈ Bone-Dry: Thoroughly pat washed vegetables dry with a kitchen towel; water is the enemy of searing.
◈ Blistering Heat: Wait until your wok or skillet is visibly smoking before adding the oil and vegetables.
◈ Work in Batches: Overcrowding steams the food; cook in single layers for fast, effective searing.
The Reward for Your Effort
◎ Caramelization: This technique creates delicious, lightly charred, sweet spots on your veggies.
◎ Textural Contrast: Provides the perfect crunch against the tender chicken in your chicken stir-fry.
◎ Nutrient Retention: Quick-cooking preserves more vitamins and minerals compared to boiling.
Pro Tip:Toss your vegetables in just a teaspoon of oil before adding them to the wok; this helps them sear instead of steam.
No Wok? No Problem! How to Achieve Perfect Results with a Regular Skillet
🔥 1. Preheat Perfection
→ Key Technique: Heat your skillet over medium-high heat for a full 5 minutes before adding oil
→ Why It Works: Creates the high-heat environment needed for proper searing
→ Pro Tip: Test heat by sprinkling a few water droplets – they should sizzle and evaporate instantly
📦 2. Batch Cooking
→ Key Technique: Cook chicken and vegetables in batches, never overcrowding the pan
→ Why It Works: Prevents steaming and ensures each piece gets properly seared
→ Pro Tip: Use a second plate to hold cooked batches while finishing the rest
📏 3. Pan Size Matters
→ Key Technique: Use the largest skillet you own (12-inch is ideal) to maximize surface area
→ Why It Works: More surface area means better heat distribution and less crowding
→ Pro Tip: If you only have small skillets, consider using two simultaneously
🥘 4. Deglazing Magic
→ Key Technique: After cooking, add a splash of sauce to scrape up flavorful browned bits
→ Why It Works: Incorporates the caramelized fond into your sauce for deeper flavor
→ Pro Tip: Use a wooden spatula to gently scrape the bottom of the pan
🌡️ 5. Temperature Control
→ Key Technique: Adjust heat as needed – don’t be afraid to lower it if smoking excessively
→ Why It Works: Prevents burning while maintaining sufficient cooking temperature
→ Pro Tip: Keep the heat at medium-high rather than maximum to control cooking better
⏱️ 6. Timing Adjustment
→ Key Technique: Add ingredients in stages, allowing each to cook properly before adding the next
→ Why It Works: Ensures all components finish cooking at the same time
→ Pro Tip: Cook dense vegetables like broccoli first, then quicker-cooking peppers
Pro Tip: For the best skillet results, pat all ingredients completely dry before cooking and have everything prepped and within reach – once you start cooking, things move quickly and you won’t have time to chop or measure!
Beyond Broccoli: Customizing Your Stir-Fry Veggie Mix
Unlock endless variety by using this recipe as your foundational template Seasonal, Colorful & Perfect for Cleaning the Fridge
This recipe is a perfect template for using seasonal produce. While broccoli and peppers are classic, the possibilities are endless for creating your own signature dish.
Quick-Cooking Vegetable Ideas
★ Snap Peas: Add whole for a juicy, sweet crunch in the last 2 minutes of cooking.
★ Water Chestnuts: Toss in canned (drained) ones for an unbeatable, crisp texture.
★ Zucchini: Halve and slice into half-moons; they cook quickly and absorb flavor beautifully.
Heartier Vegetable Adjustments
✔ Carrots: Julienne or shave them thinly so they cook at the same rate as other veggies.
✔ Cauliflower: Break into very small florets for maximum surface area and faster cooking.
✔ Green Beans: Blanch them in boiling water for 60 seconds first to tenderize before stir-frying.
Pro Tip:Add delicate greens like spinach or bok choy at the very end, just wilting them into the hot chicken stir-fry off the heat.
Why This Stir-Fry is a Nutritional Powerhouse for Your Health
🥥 1. Coconut Aminos
→ Health Benefit: A lower-sodium alternative to soy sauce, supporting heart health
→ Key Nutrients: Contains 17 amino acids, potassium, and vitamin C
→ Wellness Impact: Helps maintain healthy blood pressure levels naturally
🧄 2. Fresh Garlic
→ Health Benefit: Contains allicin, a compound with potent anti-inflammatory properties
→ Key Nutrients: Rich in manganese, vitamin B6, and vitamin C
→ Wellness Impact: Supports immune function and cardiovascular health
🫚 3. Fresh Ginger
→ Health Benefit: Contains gingerol, a potent anti-inflammatory and antioxidant
→ Key Nutrients: Provides magnesium, potassium, and copper
→ Wellness Impact: Aids digestion and helps reduce muscle pain and soreness
🥦 4. Broccoli
→ Health Benefit: Packed with vitamins C and K, fiber, and antioxidants
→ Key Nutrients: Excellent source of folate, potassium, and iron
→ Wellness Impact: Supports detoxification and promotes healthy digestion
🫑 5. Bell Peppers
→ Health Benefit: Rich in vitamin C (more than oranges) and antioxidants
→ Key Nutrients: High in vitamin A, folate, and potassium
→ Wellness Impact: Supports eye health and boosts immune system function
🍗 6. Chicken Breast
→ Health Benefit: Lean protein source that supports muscle growth and repair
→ Key Nutrients: High in protein, low in fat, with B vitamins and selenium
→ Wellness Impact: Promotes satiety and helps maintain a healthy weight
Pro Tip: For maximum nutrient retention, cook vegetables until just crisp-tender (al dente) and avoid overcooking – this preserves heat-sensitive vitamins like vitamin C and maintains beneficial enzymes!
The Family-Friendly Factor: How to Adjust Spice Levels for Kids
Simple tricks to make this healthy dinner a win for every family member Mild for Kids, Spicy for Adults & Happy Compromises
Transforming this dish into a kid-approved meal is easier than you think. The recipe’s simple sauce and familiar ingredients are a perfect canvas for easy adjustments that please both little ones and adults.
Creating a Mild Masterpiece
▣ Sauce on the Side: Serve the sauce separately, allowing kids to dip rather than coating their entire portion.
▣ Omit Aromatics: Cook a small portion of the chicken and veggies without garlic and ginger for sensitive palates.
▣ Sweeten Naturally: Stir a teaspoon of honey or orange juice into the kids’ portion to enhance sweetness.
Amplifying Heat for Adults
▣ Spice Toppings Bar: Set out small bowls of red pepper flakes, sriracha, or sliced chilies for adults to customize their plates.
▣ Infused Oil: Sauté a dried chili in the oil before adding other ingredients for a deep, pervasive heat.
▣ Garnish Kick: Top adult servings with freshly sliced jalapeños or a drizzle of chili crisp for texture and spice.
Pro Tip:Reserve a portion of the cooked, unsauced stir-fry for kids before adding the sauce to the main wok, then customize each portion easily.
Secret #7: ♻️ Leftover Rebirth Ideas
Creative Ways to Enjoy Chicken Stir-Fry Again
🥬 1. Lettuce Cups
→ Fresh Twist: Spoon leftover chicken stir-fry into crisp lettuce leaves
→ Quick Lunch: Add sliced cucumbers and carrots for extra crunch
→ Party Style: Serve mini cups as appetizers for guests
🥔 2. Baked Potato Topper
→ Hearty Upgrade: Use chicken stir-fry as a savory baked potato topping
→ Creamy Finish: Add sour cream or Greek yogurt for richness
→ Cheesy Layer: Sprinkle with melted cheddar or mozzarella
🥚 3. Breakfast Scramble
→ Morning Boost: Mix chicken stir-fry into scrambled eggs
→ Balanced Start: Pair with whole-wheat toast for extra fiber
→ Flavor Kick: Add hot sauce or salsa for a spicy twist
🍝 4. Noodle Bowl
→ Quick Fix: Toss chicken stir-fry with cooked noodles for lo mein vibes
→ Veggie Bonus: Add extra broccoli, carrots, or snap peas
→ Protein Boost: Top with tofu, shrimp, or more chicken
🌯 5. Wrap or Burrito
→ On-the-Go: Roll chicken stir-fry in a tortilla with rice
→ Extra Flavor: Add cheese, beans, or avocado slices
→ Make-Ahead: Wrap in foil for an easy packed lunch
🥗 6. Grain Bowl
→ Balanced Bite: Layer chicken stir-fry over quinoa or brown rice
→ Fresh Twist: Add a drizzle of sesame dressing
→ Meal Prep: Store in containers for quick weekday lunches
Pro Tip: Transforming your chicken stir-fry into new dishes makes leftovers exciting, saves money, and reduces waste — a smart move for busy kitchens!
Essential kitchen equipment for making stir-fry, a carbon steel wok held by hands with subtle steam rising.
Close-up of measuring spoons used to portion baking soda for the chicken velveting technique.
Hands whisking the homemade signature sauce made with coconut aminos and ginger.
Having the right equipment transforms cooking from a chore into an art. These three tools are fundamental for executing this recipe with precision and ease.
A Carbon Steel Wok: Essential for achieving high-heat searing and authentic stir-fry flavor.
Measuring Spoons: Crucial for accurately portioning the baking soda for the velveting process.
A Whisk & Bowl: The best tools for emulsifying your signature sauce into a smooth, cohesive mixture.
Pro Tip: Season your carbon steel wok properly before use. A well-seasoned wok creates a natural non-stick surface and enhances the flavor of everything you cook in it.
Step one: Slice the chicken breast into thin, uniform strips for the velveting process.
Step two: Coat the chicken strips with baking soda and water to velvet them.
Step three: Rinse the baking soda off the velveted chicken strips thoroughly.
Step four: Stir-fry the velveted chicken strips in a hot wok until cooked.
Step five: Add broccoli florets and bell pepper to the wok with the chicken.
Step six: Pour the homemade signature sauce into the wok to combine everything.
Follow this sequence of steps to ensure your stir-fry is cooked perfectly, with each component retaining its ideal texture and flavor.
Slicing Chicken: Cut chicken into uniform strips for even cooking and velveting.
Coating Chicken: Toss chicken with baking soda to begin the tenderizing process.
Rinsing Chicken: Thoroughly rinse off the baking soda and pat the chicken completely dry.
Stir-Frying Chicken: Cook the chicken in hot oil until seared and cooked through.
Adding Vegetables: Introduce vegetables to the wok and stir-fry until crisp-tender.
Pouring Sauce: Add the signature sauce to the wok, simmering until it thickens and coats everything.
Pro Tip: Have all your ingredients prepped and within arm’s reach of the stove before you turn on the heat. Stir-frying is a fast process with no time to stop and chop.
Everything you need to make this healthy, gluten-free stir-fry. Featuring the key velveting ingredient (baking soda) and sauce components (coconut aminos, orange juice, ginger).
This healthy stir-fry brings together simple, wholesome components to create a symphony of flavor and texture. The magic lies in the combination of a quick velveting marinade for the protein and a simple, homemade sauce that is both gluten-free and packed with umami.
The velveting process uses just baking soda and water to transform chicken into its most tender version.
The signature sauce combines coconut aminos, fresh orange juice, grated ginger, and toasted sesame oil.
Fresh broccoli, crisp bell pepper, and aromatic garlic round out the stir-fry with color and nutrition.
Pro Tip:For the most flavorful results, use freshly squeezed orange juice instead of bottled. The bright, vibrant acidity makes the sauce taste truly exceptional.
Recipe Card: Now That’s What We Call a Perfect Dinner
Share your creation in the comments or on social media with pinterest
Congratulations, you’ve just created a restaurant-worthy meal that’s actually good for you! This isn’t just another stir-fry; it’s your new secret weapon for healthy, impressive eating.
Savor the moment. Take that first bite of incredibly tender chicken and crispy veggies.
You’re a pro now. You’ve mastered velveting, the game-changing technique chefs use.
This is your canvas. Remember this method and sauce for endless flavor combinations.
Pro Tip:Let the stir-fry rest for just 2 minutes off the heat before serving. This allows the sauce to thicken slightly and cling perfectly to every single ingredient.
If this recipe made your taste buds happy and your weeknight easier, would you do us a huge favor? Tap those stars in the recipe card above to let us know how you liked it! Your feedback helps us create more recipes you’ll love.
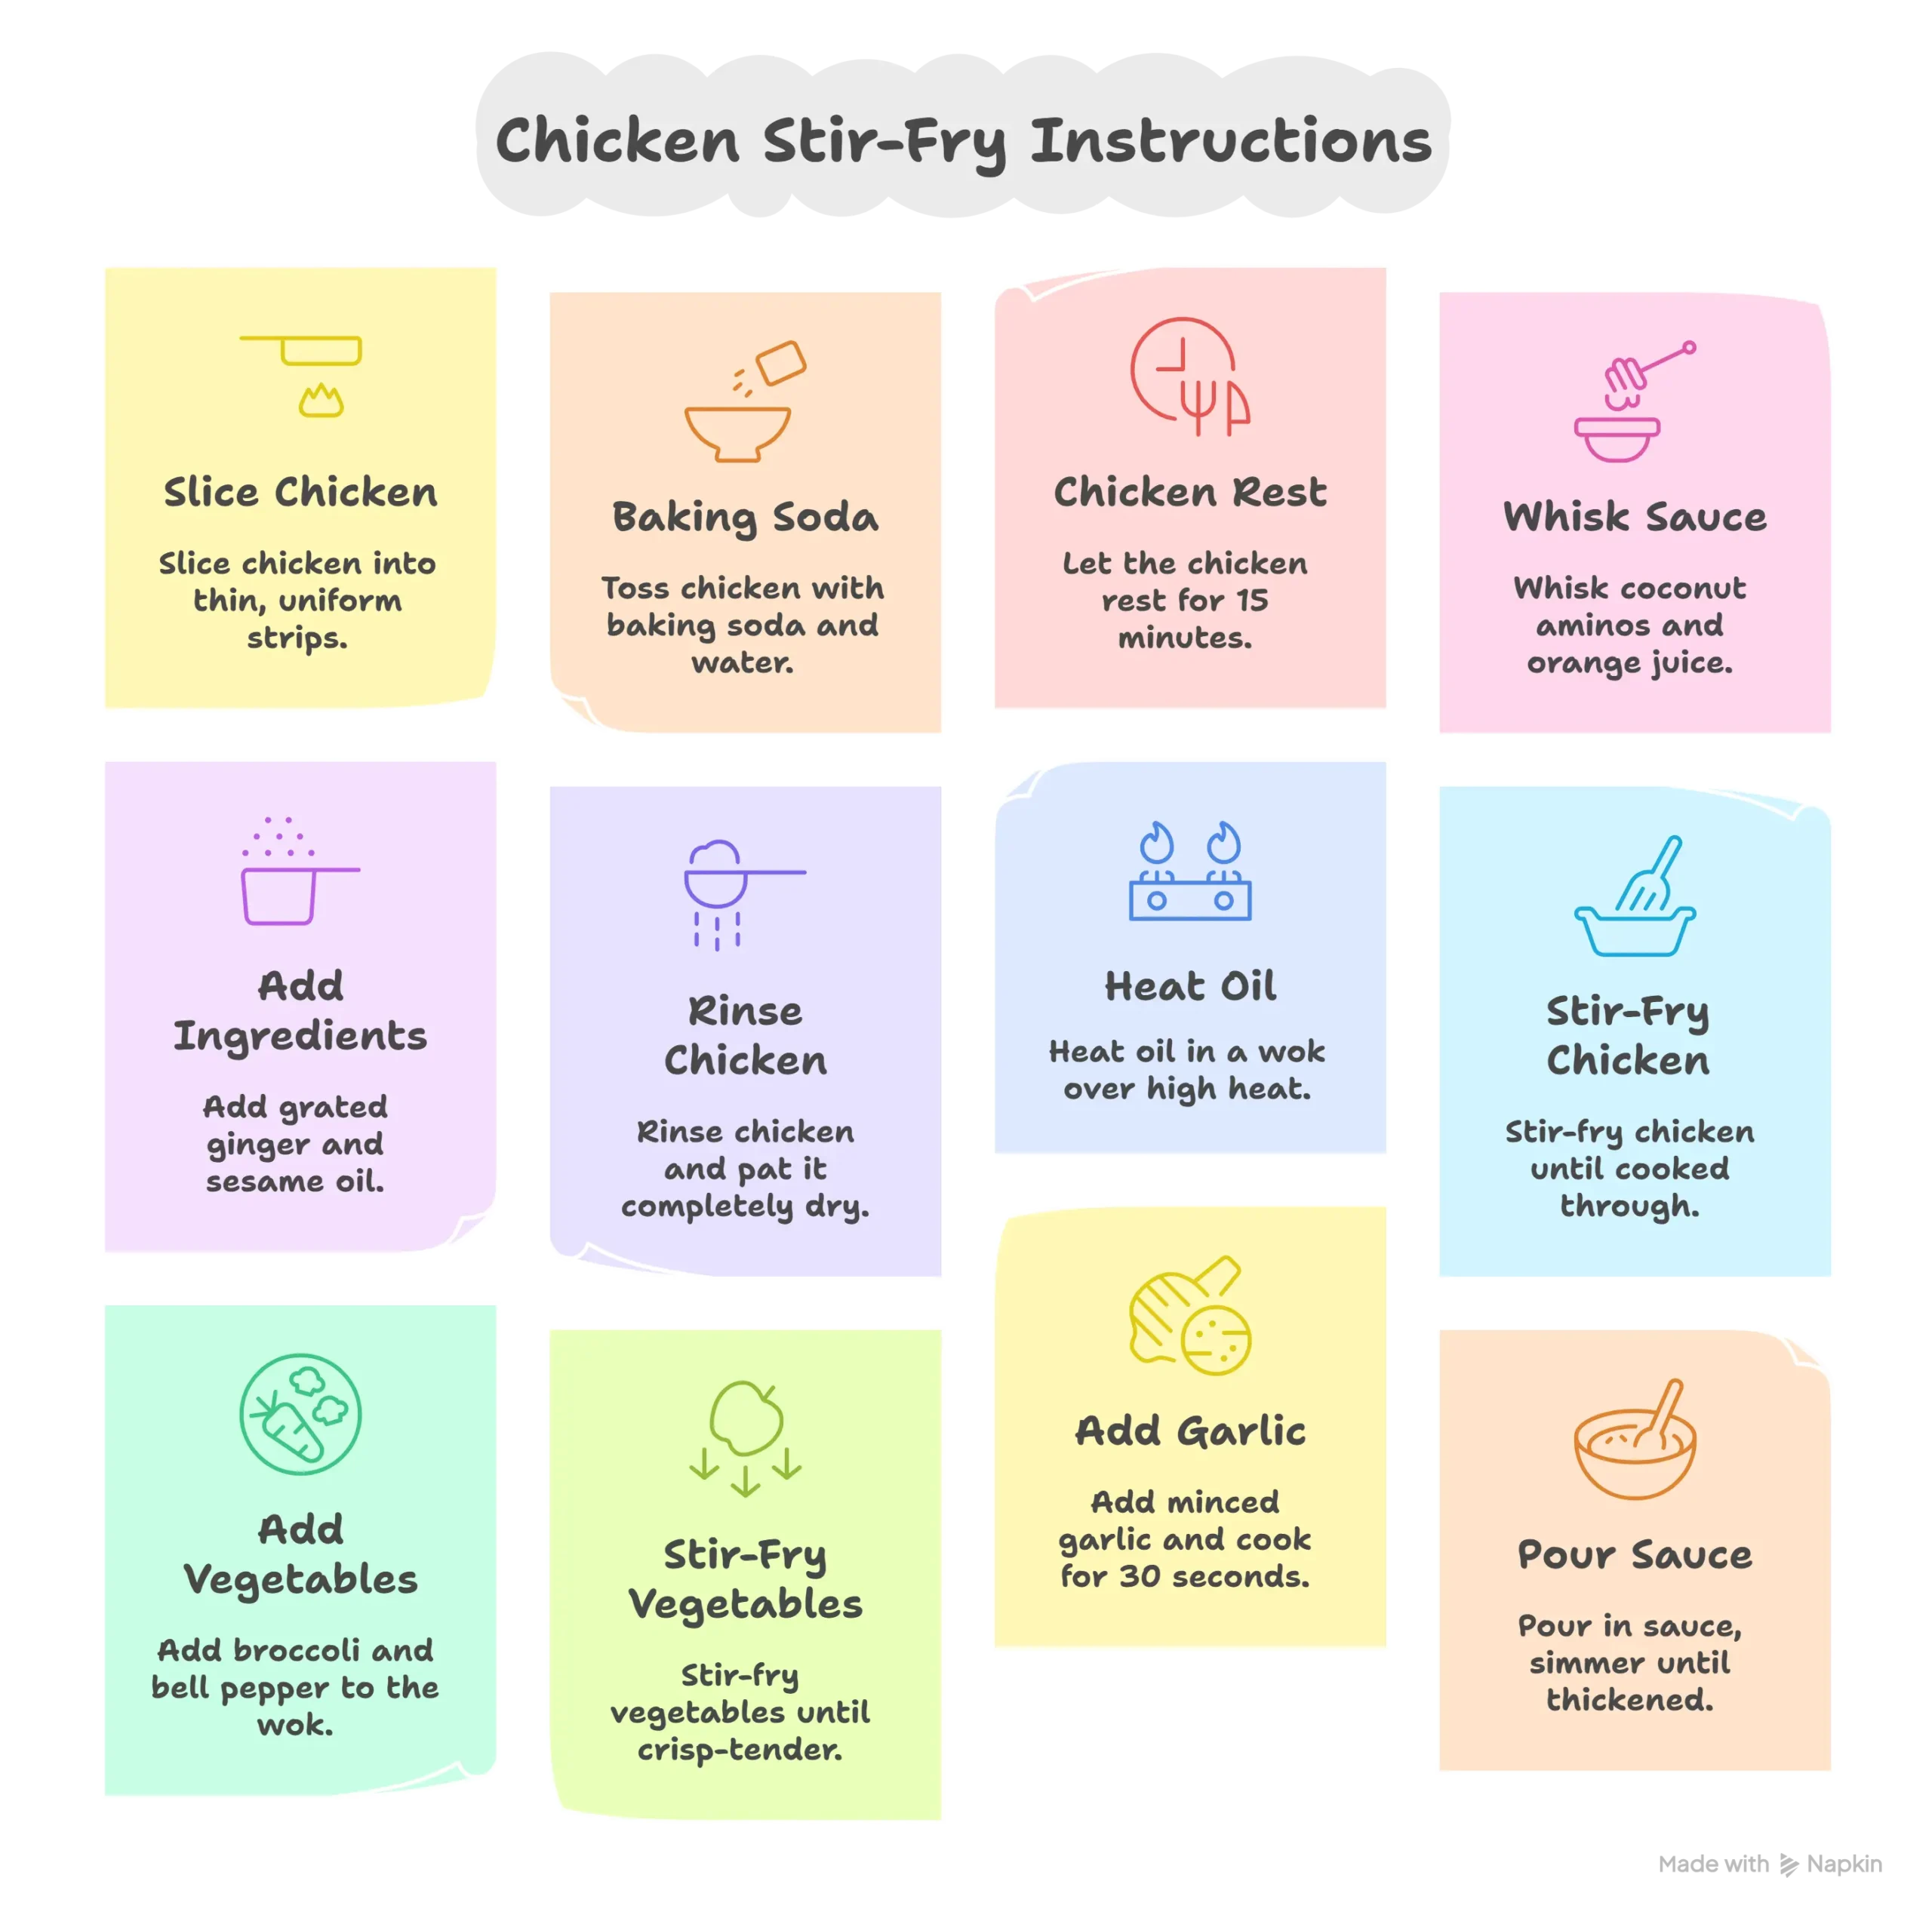
Instructions Infographic: Your Path to Stir-Fry Mastery
Unlocking Restaurant Techniques in Your Home Kitchen
Follow these 12 simple steps to create restaurant-quality stir-fry at home, featuring the secret velveting technique for incredibly tender chicken.
Achieving restaurant-quality results at home is straightforward with a focus on technique and timing. The process revolves around proper preparation, high-heat cooking, and combining elements at the right moment for the perfect finish.
Begin by velveting the chicken strips to ensure an incredibly tender and juicy texture.
Whisk together the simple sauce and prepare all vegetables before you start cooking.
Cook components in a hot wok in stages, finishing by simmering everything in the sauce until glossy.
Pro Tip:Ensure your chicken is patted completely dry after rinsing off the baking soda. This is the secret to getting a beautiful sear instead of steaming the meat.
Your Journey to Flawless Stir-Fry Starts Now
You have the secrets; all that’s left is to turn on the stove Confident Cooking, Healthier Meals & Joyful Family Dinners
You’ve unlocked the techniques that separate takeout from truly great homemade meals. This isn’t just a single recipe—it’s your new foundation for creating countless quick, healthy, and impressive dinners that cater to your every need.
~ What You’ve Mastered ~
✅ The Velveting Edge: You now know the simple secret to guaranteeing tender, never-rubbery protein every time.
✅ Sauce Simplicity: You can whip up a flavorful, gluten-free sauce from scratch faster than delivery can arrive.
✅ Vegetable Perfection: You understand the high-heat principles for achieving crisp-tender, vibrant veggies.
~ Your Culinary Passport ~
✅ Global Creativity: You possess the template to explore Thai, Korean, or Chinese flavors any night of the week.
✅ Dietary Confidence: You can effortlessly adapt meals to be gluten-free, low-sodium, or packed with extra veggies.
✅ Weeknight Victory: You have a guaranteed 30-minute strategy to defeat dinner stress and feed your family well.
Pro Tip: Bookmark this page. Come back to this foundation whenever you need a reminder that a restaurant-quality, healthy chicken stir-fry is always within your reach, ready in just half an hour.
Secret #8: 🌍 The Global Twist Table
How to Give Chicken Stir-Fry a World-Class Flavor
🇺🇸 1. Thai Twist (Popular in US)
→ Base Boost: Mix chicken stir-fry sauce with 2 tbsp peanut butter, 1 tbsp lime juice, and 1 tsp red curry paste
→ Garnish: Top with cilantro and crushed peanuts
→ Fresh Appeal: Perfect for giving your chicken stir-fry a sweet-spicy American-friendly twist
🇨🇦 2. Korean Twist (Loved in Canada)
→ Sauce Upgrade: Stir in 1.5 tbsp gochujang (check gluten-free label) and 1 tsp rice vinegar
→ Garnish: Add sesame seeds and sliced green onion
→ Flavor Punch: A bold way to enjoy chicken stir-fry with a Canadian-Korean crossover
🇬🇧 3. Japanese Teriyaki Twist (UK Favorite)
→ Sauce Blend: Mix in 1 tbsp honey (or maple syrup) with 1 minced garlic clove, simmer until thickened
→ Garnish: Sprinkle with white sesame seeds
→ Sweet Balance: Brings teriyaki-style depth to chicken stir-fry for UK home cooks
🇦🇺 4. Extra Aussie Ideas
→ Veggie Boost: Add grilled zucchini and red peppers for color
→ Garnish: Fresh basil or parsley for brightness
→ Family Style: Serve chicken stir-fry over rice bowls — a hit in Australian homes
🌐 5. Fusion Inspiration
→ Mix & Match: Try swapping sauces to build your own global chicken stir-fry
→ Creative Touch: Add local ingredients like maple syrup in Canada or Marmite in the UK
→ Endless Options: Turn leftovers into wraps, noodles, or bowls inspired by world flavors
📌 6. High-Value Cooking Tip
→ Premium Angle: Global twists make your chicken stir-fry look restaurant-quality
→ Engagement Boost: Unique versions drive foodie interest and social shares
→ SEO Value: Keeps your chicken stir-fry relevant for global recipe searches
Pro Tip: Use these international twists to transform your chicken stir-fry into a global experience — perfect for audiences in high-CPM countries who love premium recipes!
FAQs: Your Chicken Stir-Fry Questions Answered!
Q1. Is the velveting technique with baking soda safe? Does it leave a taste?
Absolutely safe when done correctly! The baking soda is rinsed off completely after marinating, leaving no chemical taste behind:
Science-Backed: This is a professional Chinese cooking technique used for centuries.
No Residual Taste: Thorough rinsing ensures only the tender texture remains.
Digestion-Friendly: The minimal amount used and complete removal make it gentle on stomachs.
Better Than Cornstarch: Creates more tender results than traditional cornstarch velveting.
Pro Tip: Set a timer for exactly 15 minutes – under-marinating won’t tenderize effectively, while over-marinating can make texture too soft.
Q2. Can I make this stir-fry if I don’t have a wok?
Absolutely! While a wok is ideal, these alternatives work beautifully with one simple adjustment:
• Cast Iron Skillet: Excellent heat retention – preheat for 5 minutes before adding oil.
• Stainless Steel Pan: Cook in smaller batches to maintain high heat.
• Non-Stick Skillet: Reduce heat to medium-high to prevent damaging coating.
• Electric Skillet: Set to 400°F and work in batches for best results.
Pro Tip: Whatever pan you use, make sure it’s large enough that ingredients can sit in a single layer for proper searing instead of steaming.
Q3. My stir-fry sauce never thickens properly. What am I doing wrong?
A thin sauce usually stems from these common issues that are easily fixed:
• Insufficient Reduction: Let the sauce bubble vigorously for 1-2 minutes to reduce.
• Overcrowded Pan: Too many vegetables release water that thins the sauce.
• Incorrect Heat: Sauce needs a strong simmer to thicken properly.
• Missing Thickener: Add 1 teaspoon cornstarch mixed with 2 tablespoons water if needed.
Pro Tip: Push ingredients to the side before adding sauce, creating a well in the center where the sauce can bubble and reduce quickly.
Q4. How can I make this stir-fry spicier for adults but kid-friendly?
Creating a family-friendly stir-fry that pleases everyone is easier than you think with these strategies:
• Heat on the Side: Serve with chili oil, sriracha, or crushed red pepper for adults to add.
• Divide and Conquer: Remove kids’ portions before adding spicy elements.
• Fresh Chili Garnish: Top adult servings with sliced fresh jalapeños or Thai chilies.
• Spice-Infused Oil: Sizzle dried chilies in oil first, then remove before cooking other ingredients.
Pro Tip: Add 1-2 tablespoons of sweet chili sauce to the main dish – it provides mild heat that kids tolerate well but adds complexity adults enjoy.
Q5. Can I prepare the components ahead for meal prep?
This stir-fry is excellent for meal prep! Follow these guidelines for best results:
• Velvet in Advance: Chicken can be velveted and stored raw in the fridge for up to 24 hours.
• Sauce Separation: Whisk sauce ingredients together and store separately for up to 5 days.
• Vegetable Prep: Chop vegetables 2-3 days ahead; keep crisp in airtight containers.
• Reheating Method: Reheat in a skillet over medium-high heat to restore texture (not microwave).
Pro Tip: For meal prep, slightly undercook the vegetables so they maintain perfect texture when reheated later.
Q6. Why is my chicken still tough even after velveting?
Tough chicken after velveting typically points to one of these easily corrected issues:
• Incorrect Cutting: Always slice against the grain to shorten muscle fibers.
• Overcooking: Velveted chicken cooks faster – reduce cooking time by 30%.
• Insufficient Rinsing: Ensure all baking soda is thoroughly washed away.
• Overcrowding Pan: Crowding lowers the temperature, causing the chicken to stew rather than sear.
Pro Tip: For guaranteed tenderness, use an instant-read thermometer – remove chicken from heat at 155°F (it will carry over to 165°F as it rests).
Q7. What’s the best rice to serve with this stir-fry?
While personal preference rules, these rice varieties create perfect pairings:
• Jasmine Rice: Fragrant and slightly sticky – perfect for soaking up sauce.
• Brown Rice: Nutty flavor and extra fiber complement the healthy aspects.
• Cauliflower Rice: Low-carb option that cooks in minutes while the stir-fry rests.
• Quinoa: Protein-packed alternative with a slight crunch that holds up to sauce.
Pro Tip: Cook your rice with a teaspoon of coconut oil and a pinch of salt for restaurant-quality flavor that elevates the entire meal.
Q8. Can I use frozen vegetables instead of fresh to save time?
Frozen vegetables can work with these important adjustments for the best results:
• Thaw First: Spread frozen vegetables on paper towels to absorb excess moisture.
• Add Later: Add frozen vegetables in the last 2-3 minutes of cooking.
• Increase Heat: Use the highest heat to quickly evaporate the released water.
• Choose wisely: Broccoli, bell peppers, and snap peas freeze better than watery vegetables.
Pro Tip: For crisper results, toss still-frozen vegetables with 1 teaspoon of oil and air fry at 400°F for 5 minutes before adding to the stir-fry.


")
")
")
")

")


Pingback: How To Make A Perfect Salmon Bowl In 25 Minutes (Ideal For Meal Prep)
Pingback: 1 Best Ever Quinoa Salad Recipe (Easy And Guaranteed To Impress)
Pingback: How To Make A Healthy Diet Delicious: 5 Family-Friendly Recipes
Pingback: Best Caprese Tomato Mozzarella Salad In 10 Minutes (Easy, No Cook)